New Naqqaliشاهنامه
The Shahnameh in Maps

Where the story goes

99 story maps for the whole poem: the marches, flights, quests and sieges, each drawn on parchment and placed at the section where it happens. Open any map to see it full size and go straight to the verse.

Volume I · From Kioumars to the Great War

A5Zahhak’s Tyranny and the Uprising of Kaveh
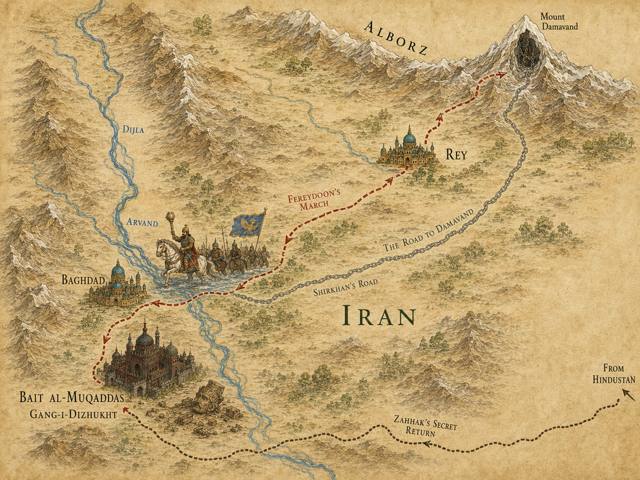
Map: Fereydoon Binds Zahhak
A5.9Fereydoon Binds Zahhak

A6The First Kings: Fereydoon

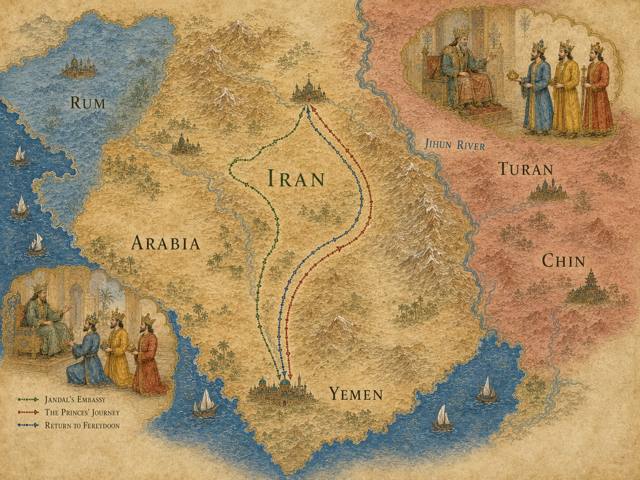
Map: Fereydoon Divides the Realm
A6.7Fereydoon Divides the Realm
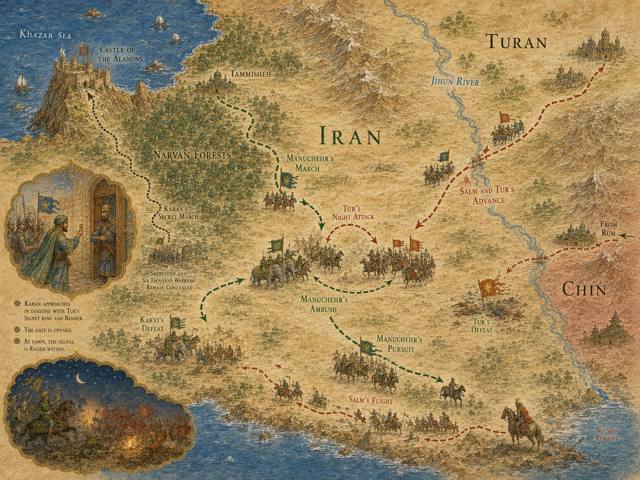
Map: Manuchehr Marches for Vengeance
A6.19Manuchehr Marches for Vengeance

A7The First Kings: Manuchehr

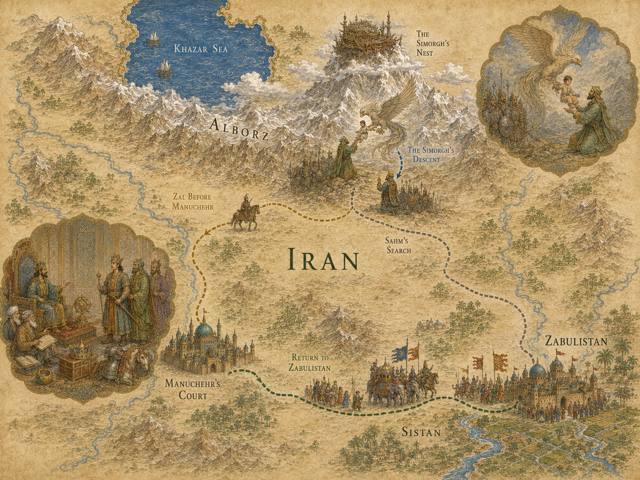
Map: Zal Returns to Zabulistan
A7.5Zal Returns to Zabulistan

A8The Story of Zal and Rudabeh

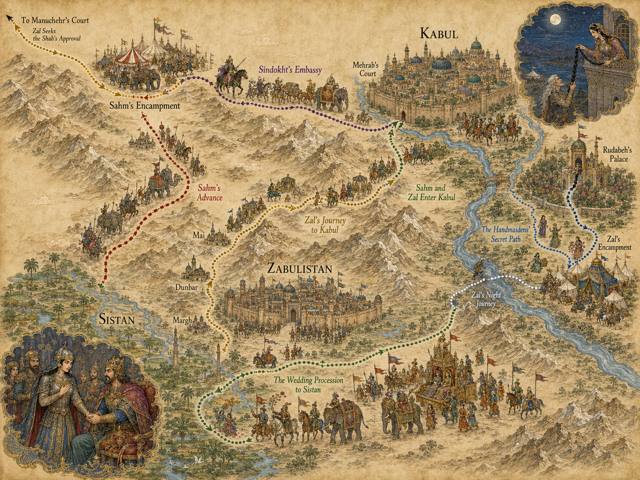
Map: Zal Returns to Kabul, Sahm and Rudabeh
A8.22Zal Returns to Kabul, Sahm and Rudabeh

A9The Birth and Early Feats of Rostam; Manuchehr’s Closing Counsel
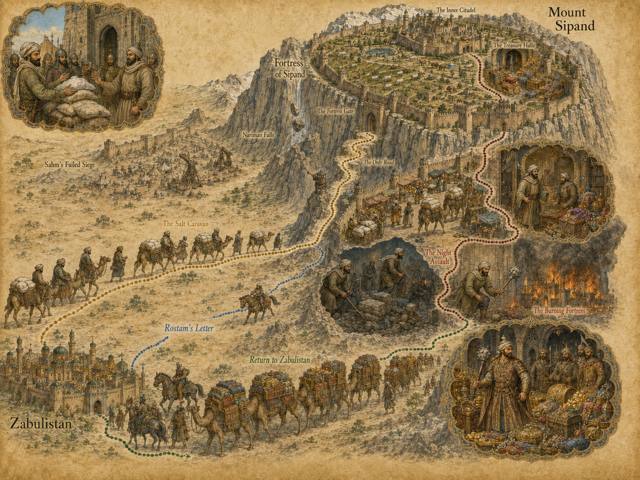
Map: Rostam Proudly Writes His Father
A9.5Rostam Proudly Writes His Father

B1The Crisis after Manuchehr

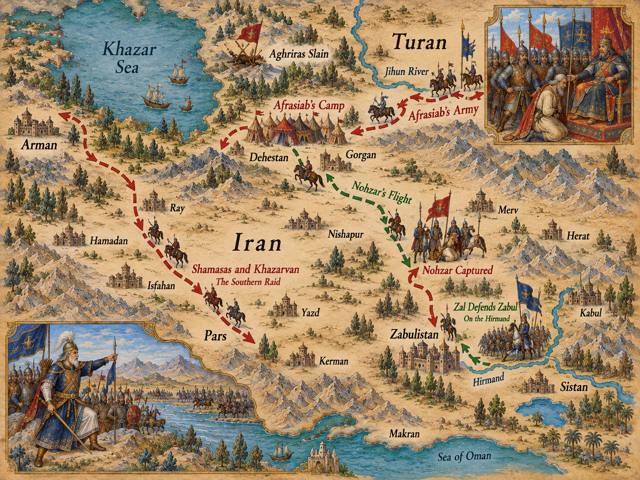
Map: Afrasiab's Invasion and the Fall of Nohzar
B1.3Afrasiab's Invasion and the Fall of Nohzar

B2Garshasp and the Transition to Kayanian Kingship
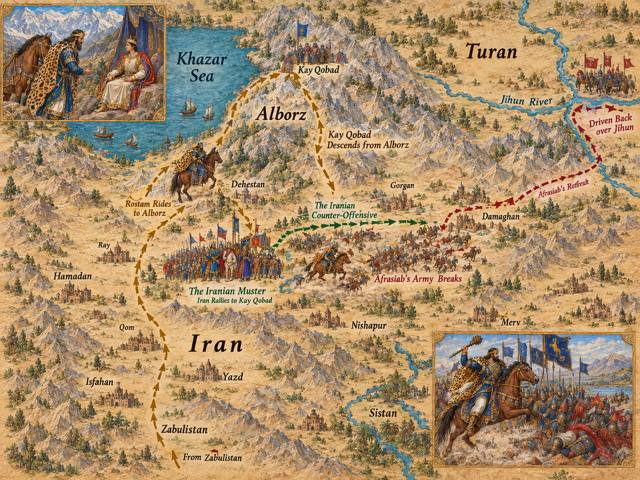
Map: Rostam Fetches Kay Qobad from the Alborz; Turan Driven Back over the Jihun
B2.4Rostam Fetches Kay Qobad from the Alborz; Turan Driven Back over the Jihun

B3Kay Qobad

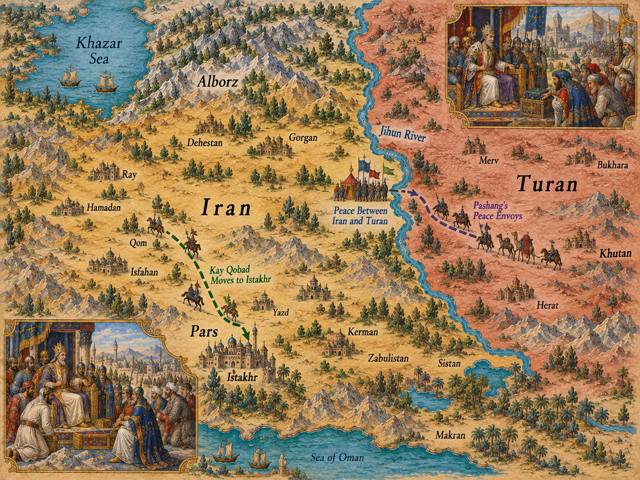
Map: The Peace of the Jihun
B3.4The Peace of the Jihun

B4The War with Mazandaran

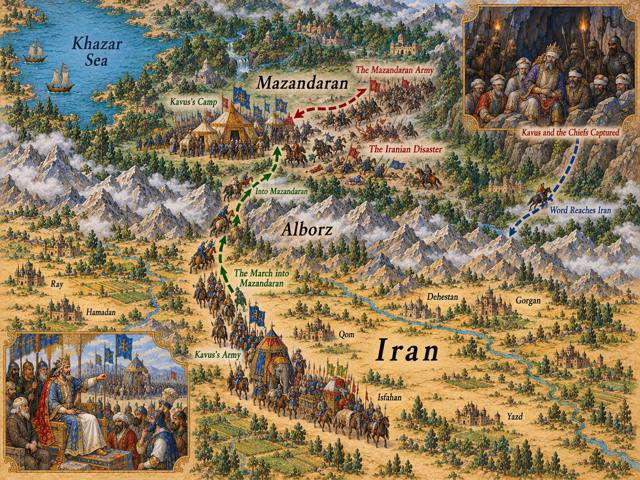
Map: Kay Kavus Ventures to Mazandaran
B4.3Kay Kavus Ventures to Mazandaran
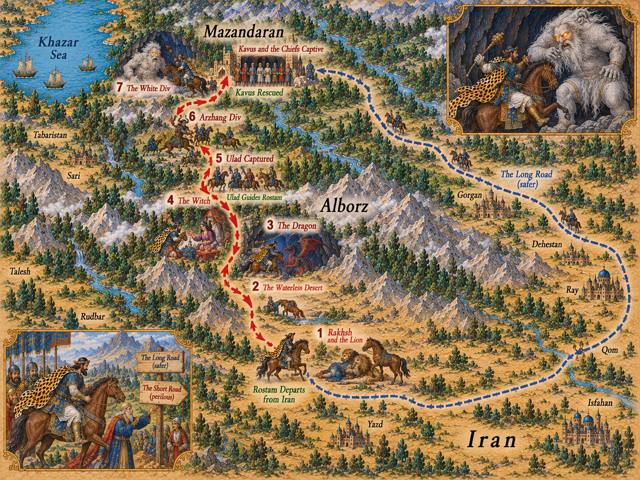
Map: The Two Roads to Mazandaran and the Seven Labors of Rostam
B4.4–B5The Two Roads to Mazandaran and the Seven Labors of Rostam

B5The Seven Labors of Rostam
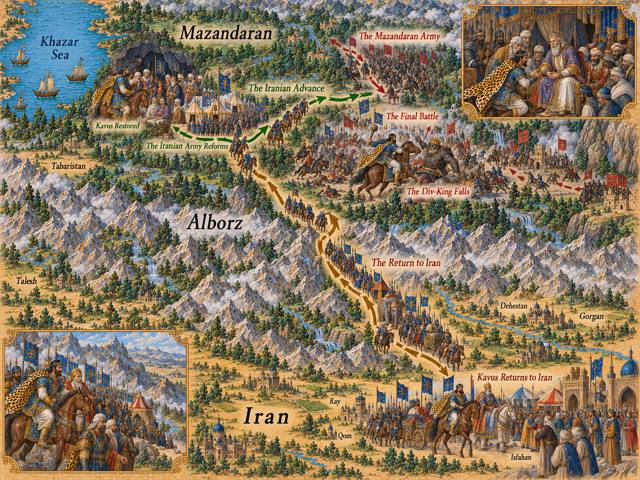
Map: Kavus's Mazandaran Campaign and the Return to Iran
B5.10–B5.11Kavus's Mazandaran Campaign and the Return to Iran

B6The Folly of Kay Kavus

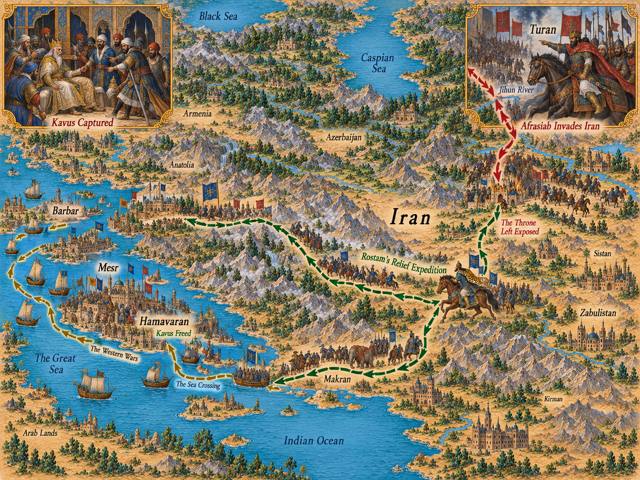
Map: The Hamavaran Sea-War and Kavus's Captivity
B6.1The Hamavaran Sea-War and Kavus's Captivity
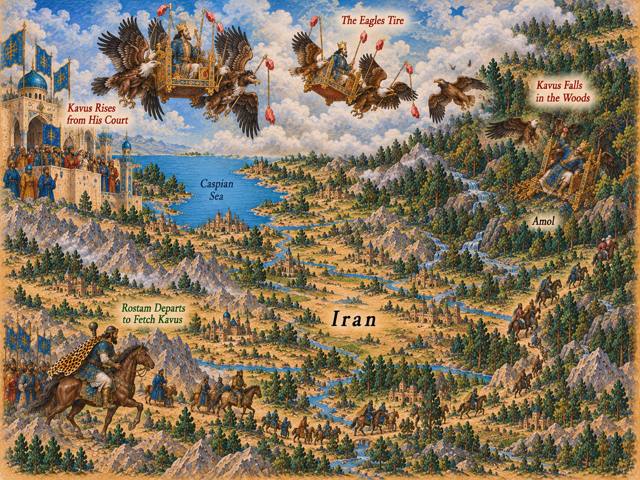
Map: Kavus's Flight to the Sky and His Fall
B6.9Kavus's Flight to the Sky and His Fall

B7The Fight of the Seven Warriors

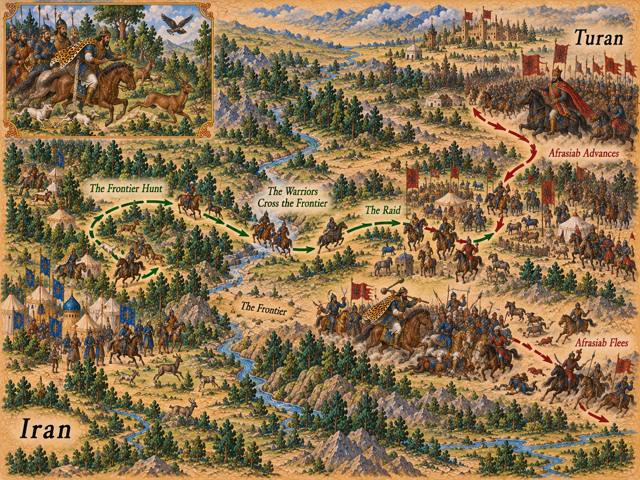
Map: The Frontier Hunt and the Clash of the Seven Champions
B7.1The Frontier Hunt and the Clash of the Seven Champions

B8The Tragedy of Rostam & Sohrab

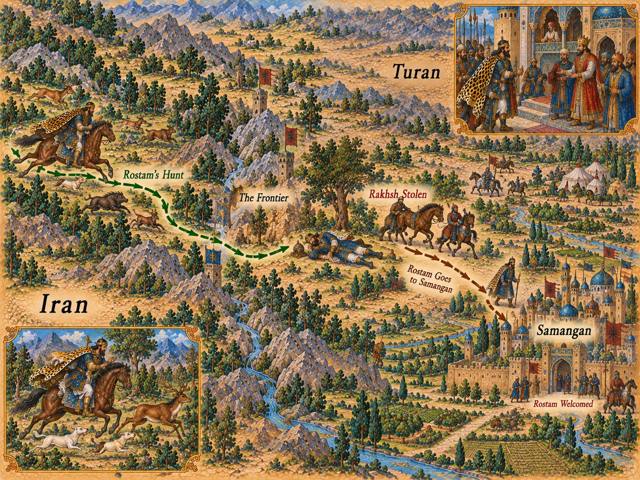
Map: Rostam's Stray Hunt and the City of Samangan
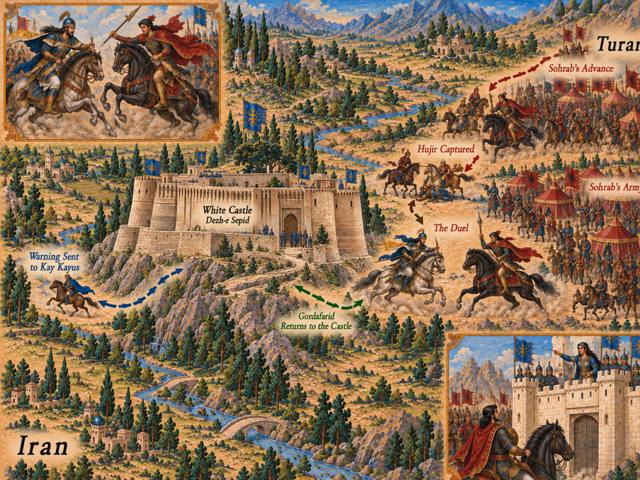
B8.2–B8.3Rostam's Stray Hunt and the City of Samangan
Map: The Fatal Convergence: Sohrab's March to the White Castle
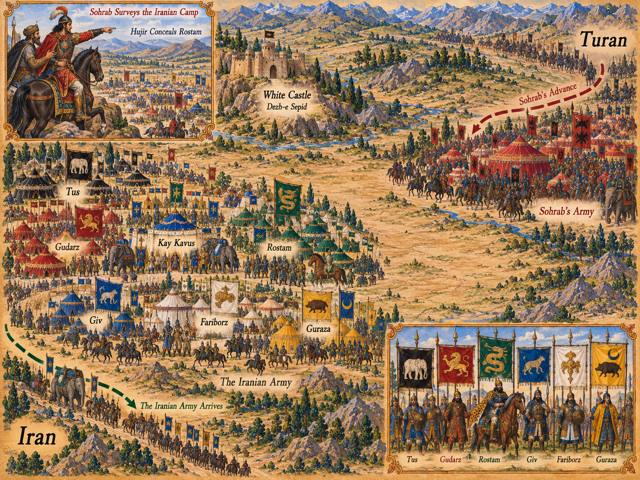
B8.7–B8.18The Fatal Convergence: Sohrab's March to the White Castle
Map: Gazhdaham’s Letter to Kavus
B8.10Gazhdaham’s Letter to Kavus
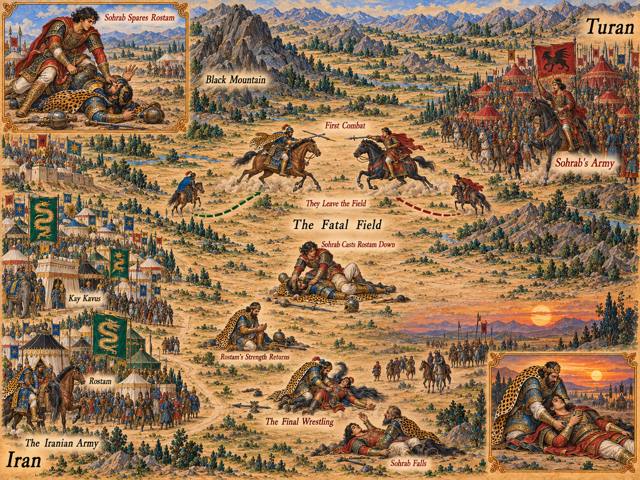
Map: Rostam and Sohrab Meet in Combat
B8.18Rostam and Sohrab Meet in Combat

B9The Story of Siavash
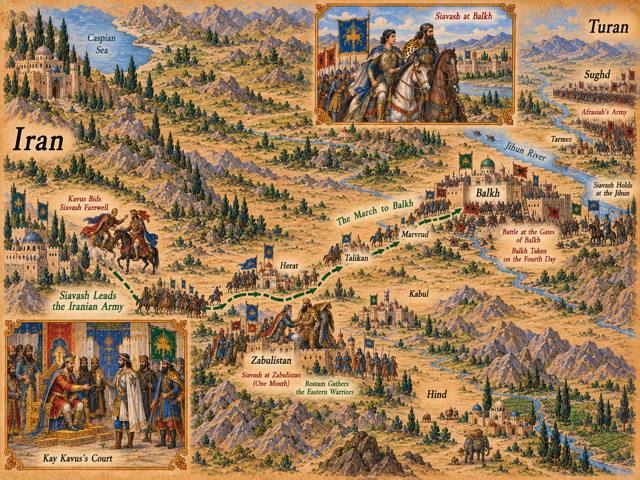
Map: Siavash Marches to the Eastern Front (toward Balkh)
B9.15–B9.16Siavash Marches to the Eastern Front (toward Balkh)
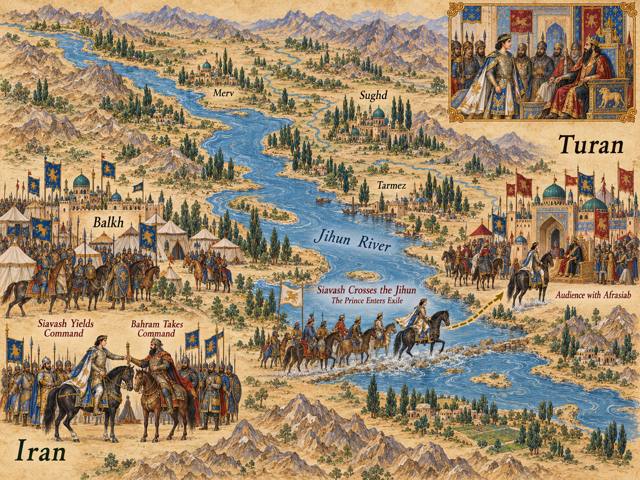
Map: Siavash Crosses the Jihun into Exile
B9.31–B9.32Siavash Crosses the Jihun into Exile
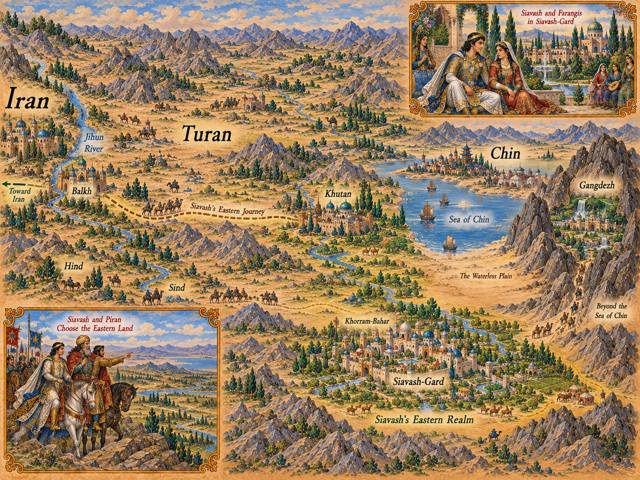
Map: Siavash's Eastern Realm: Gangdezh and Siavash-gard
B9.39–B9.44Siavash's Eastern Realm: Gangdezh and Siavash-gard
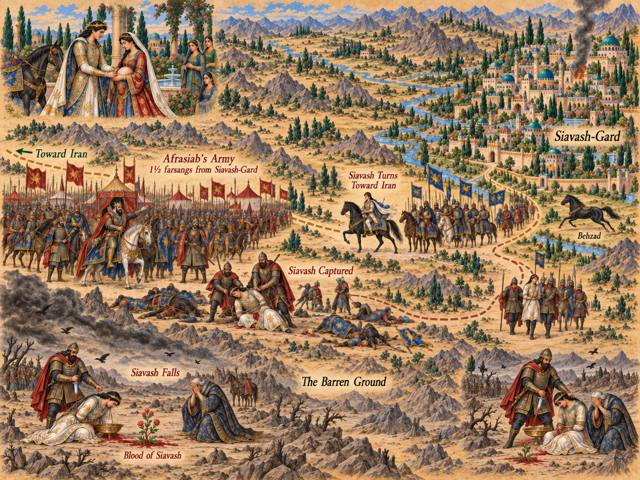
Map: The Ride to Siavash-gard and the Death of Siavash
B9.51–B9.56The Ride to Siavash-gard and the Death of Siavash

B10Vengeance for Siavash and the Retrieval of Kay Khosrow
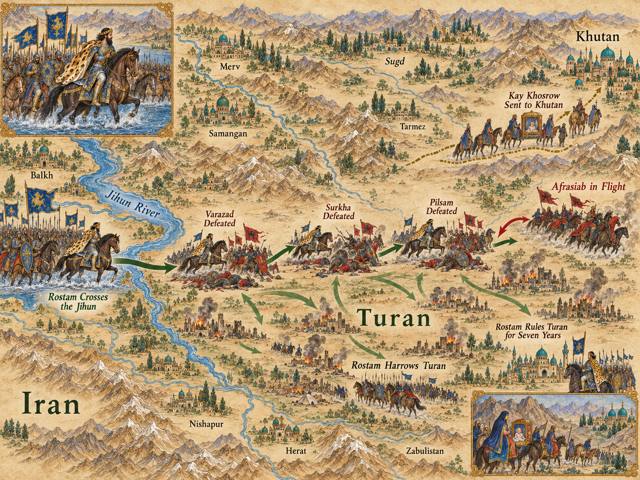
Map: Rostam's Harrowing of Turan
B10.3–B10.13Rostam's Harrowing of Turan
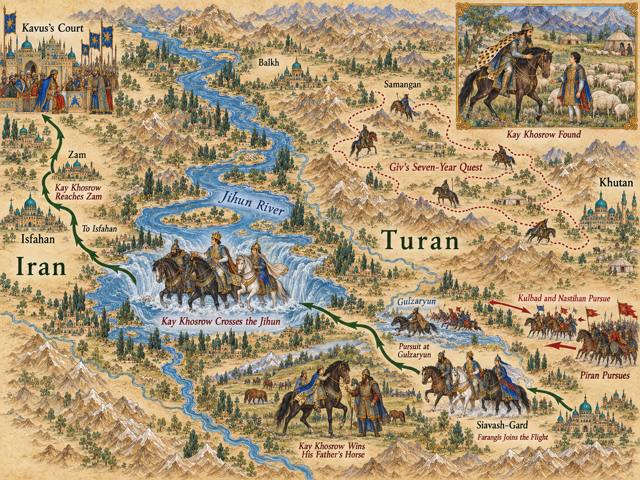
Map: Giv's Seven-Year Quest and the Flight Home across the Jihun
B10.15–B10.29Giv's Seven-Year Quest and the Flight Home across the Jihun
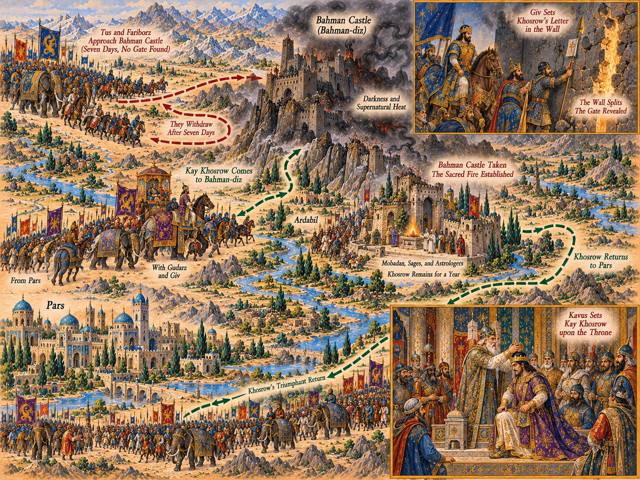
Map: Bahman Castle and Kay Khosrow's Accession
B10.34–B10.37Bahman Castle and Kay Khosrow's Accession

B11Kay Khosrow’s Kingship
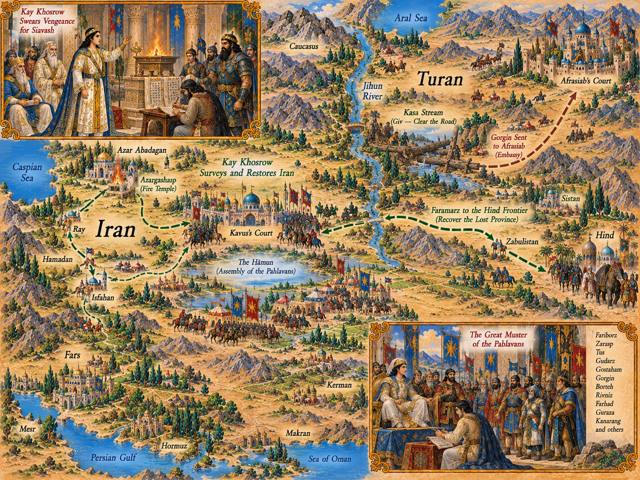
Map: The Realm Restored: Kay Khosrow’s Fronts and the Division of Commands
B11.3–B11.7The Realm Restored: Kay Khosrow’s Fronts and the Division of Commands

B12Forood and the Snowstorm Campaign

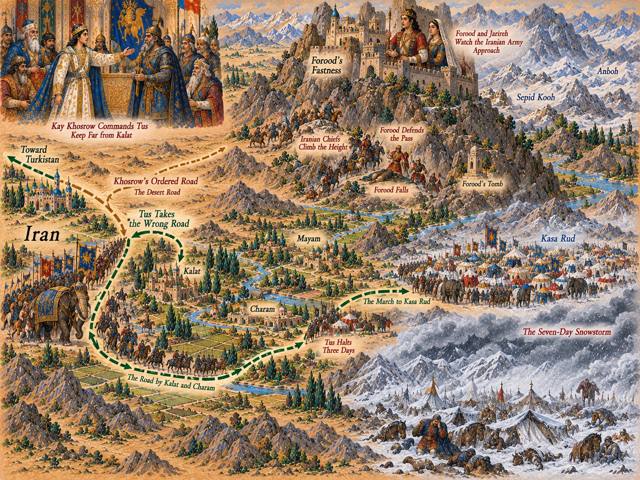
Map: The Wrong Road: Forood's Mountain and the Snowstorm Campaign
B12.2–B12.15The Wrong Road: Forood's Mountain and the Snowstorm Campaign

B13Mount Hamavan and the Kamus Campaign
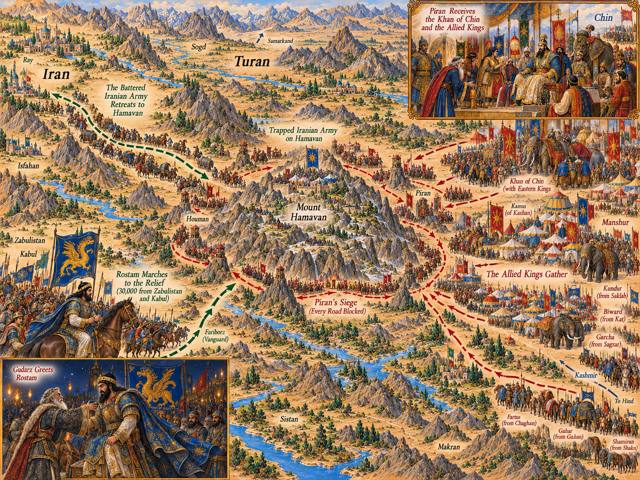
Map: The Siege of Mount Hamavan and the Gathering of the World
B13.9–B13.26The Siege of Mount Hamavan and the Gathering of the World

B14The Great Battle with the Khan of Chin
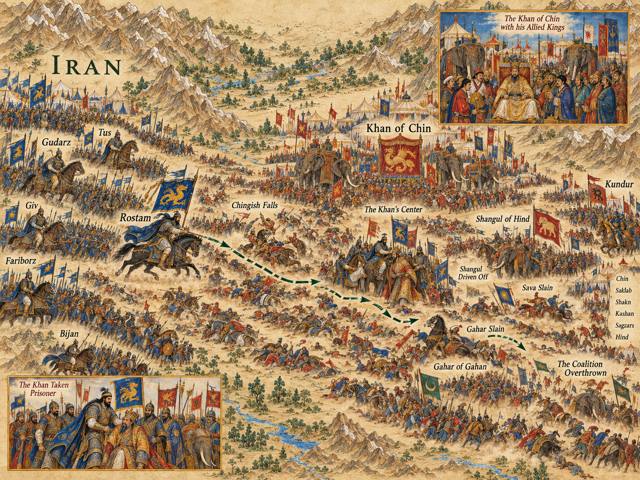
Map: The Grand Coalition: The Great Battle with the Khan of Chin
B14.1–B14.15The Grand Coalition: The Great Battle with the Khan of Chin
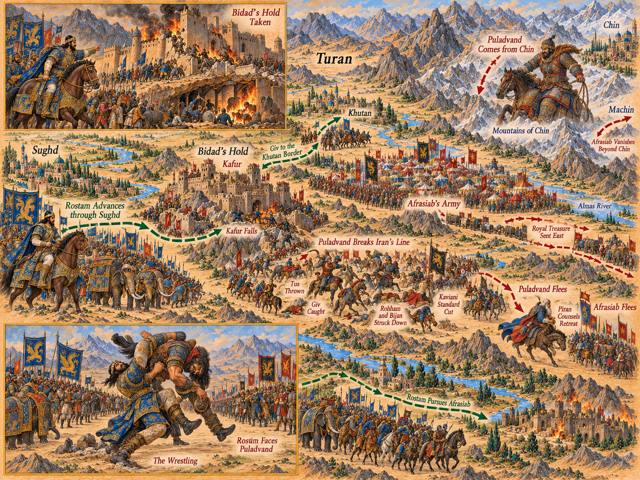
Map: Rostam Fights Kafur the Maneater
B14.20Rostam Fights Kafur the Maneater

Volume II · From Akvan to Iskandar

◈The world of this volume
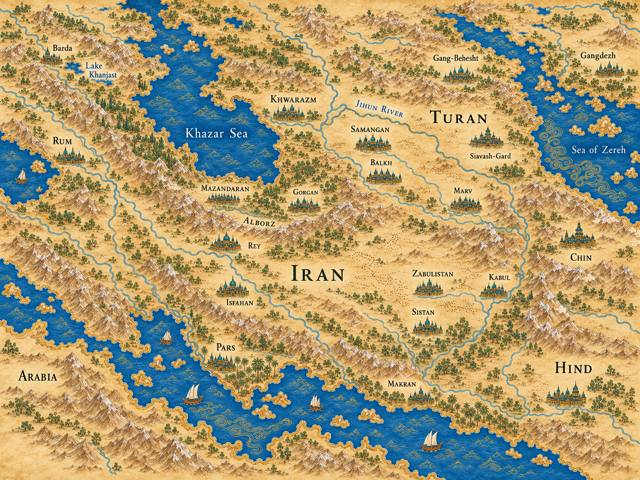
Map: The World as the Heroic Cycle Nears Its End
Volume IIThe World as the Heroic Cycle Nears Its End
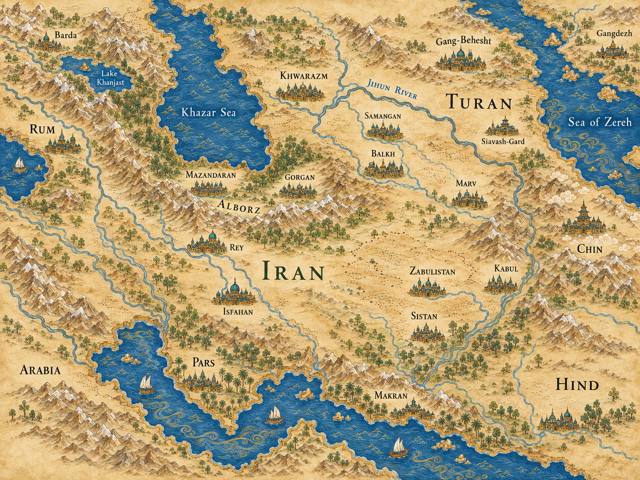
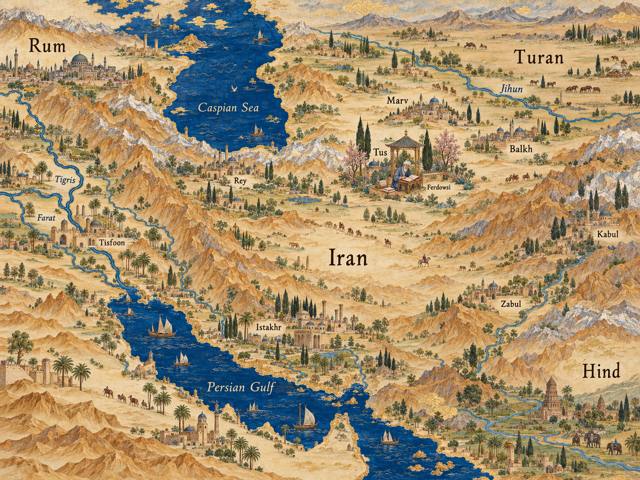
Map: Iran, Turan and the Lands Between
Volume IIIran, Turan and the Lands Between

C1Rostam and the Div Akvan

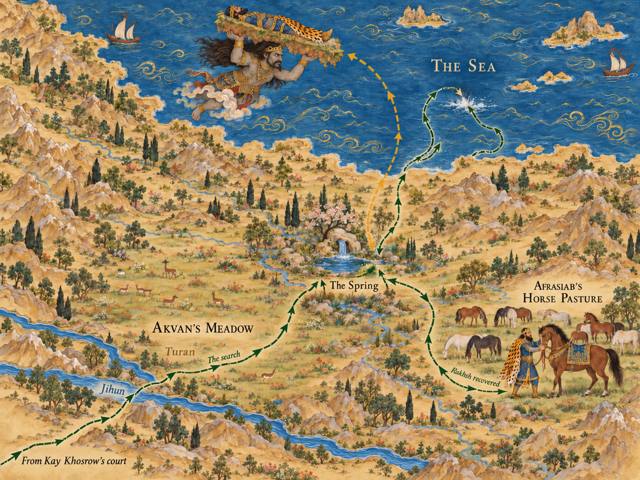
Map: Rostam and the Div Akvan
C1.3–C1.5Rostam and the Div Akvan

C2The Tale of Bijan and Manijeh
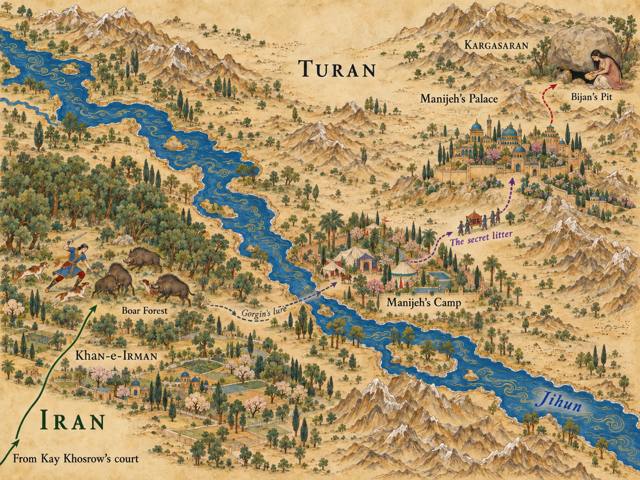
Map: Bijan's Hunt, His Capture, and the Pit
C2.3–C2.10Bijan's Hunt, His Capture, and the Pit
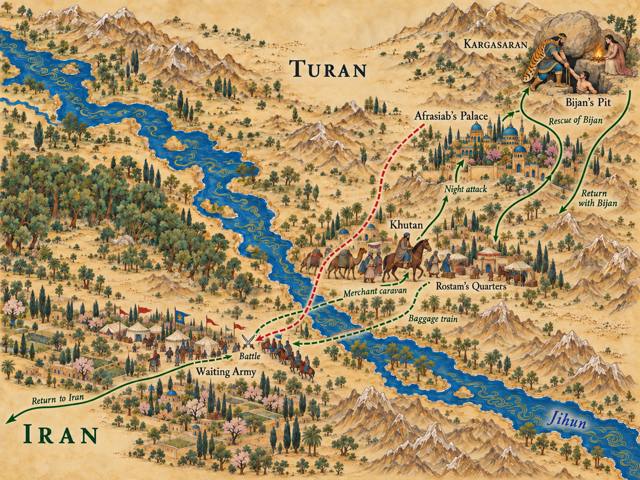
Map: Rostam's Merchant-Disguise Rescue to Khutan
C2.20–C2.27Rostam's Merchant-Disguise Rescue to Khutan

C3The Battle of the Twelve Rukhs
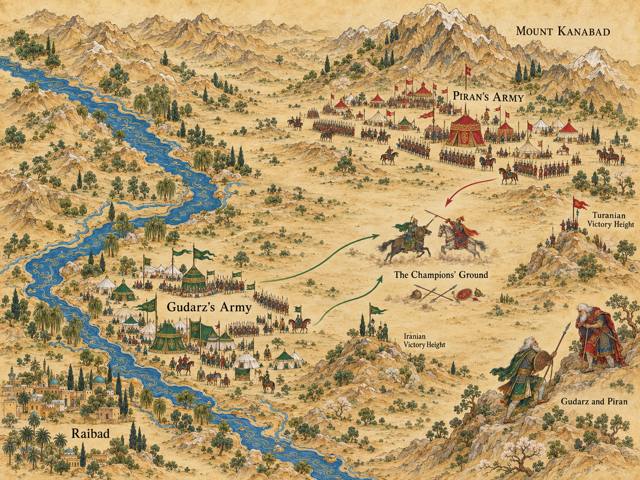
Map: The Battle of the Twelve Rukhs
C3.6–C3.39The Battle of the Twelve Rukhs
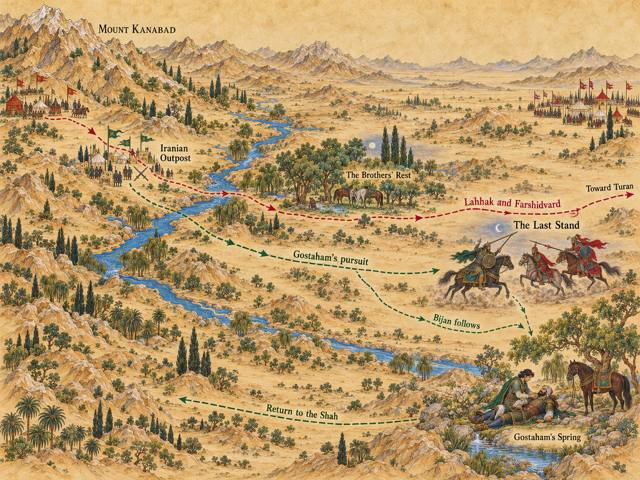
Map: The Pursuit of Lahhak and Farshidvard
C3.42–C3.45The Pursuit of Lahhak and Farshidvard

C4The Final Afrasiab Wars and the Disappearance of Kay Khosrow
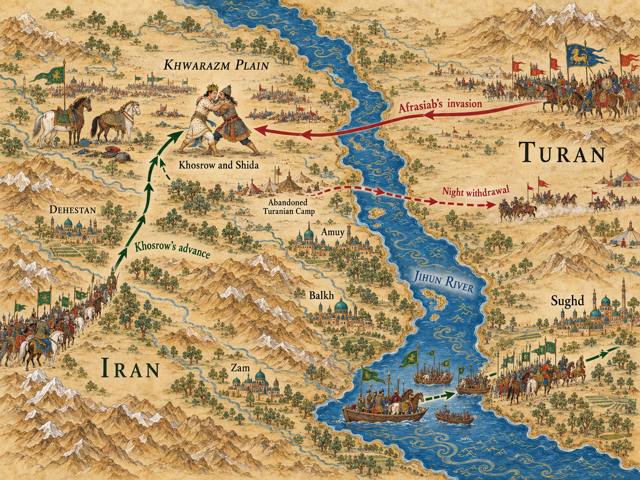
Map: Kay Khosrow's Last Offensive and the Crossing of the Jihun
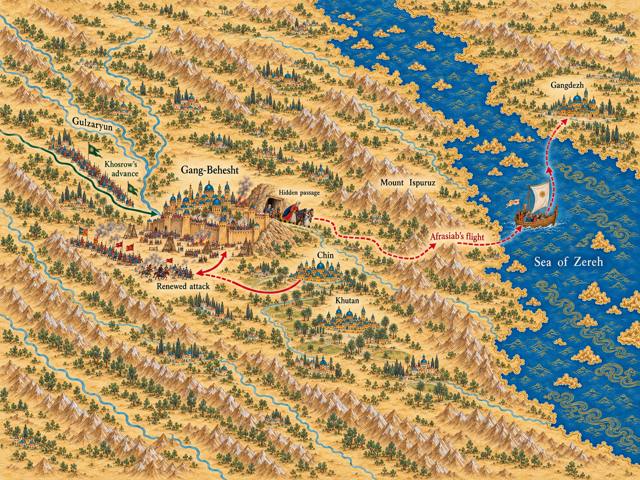
C4.2–C4.14Kay Khosrow's Last Offensive and the Crossing of the Jihun
Map: The Pursuit to the Eastern Sea
C4.13–C4.31The Pursuit to the Eastern Sea
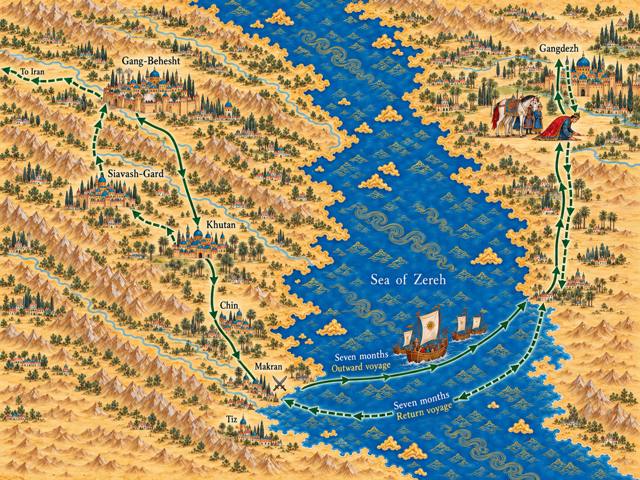
Map: Khosrow's Sea-Crossing to Gang-Dizh and the Return
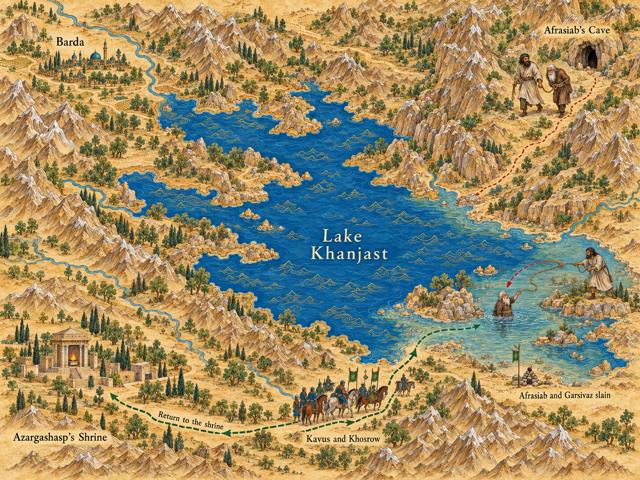
C4.34–C4.39Khosrow's Sea-Crossing to Gang-Dizh and the Return
Map: The Capture and Death of Afrasiab
C4.41–C4.45The Capture and Death of Afrasiab
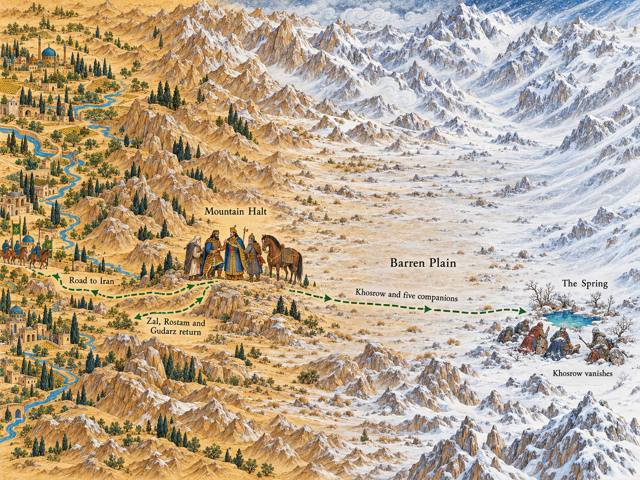
Map: The Vanishing of Kay Khosrow in the Snow
C4.61–C4.64The Vanishing of Kay Khosrow in the Snow

C5Lohrasp
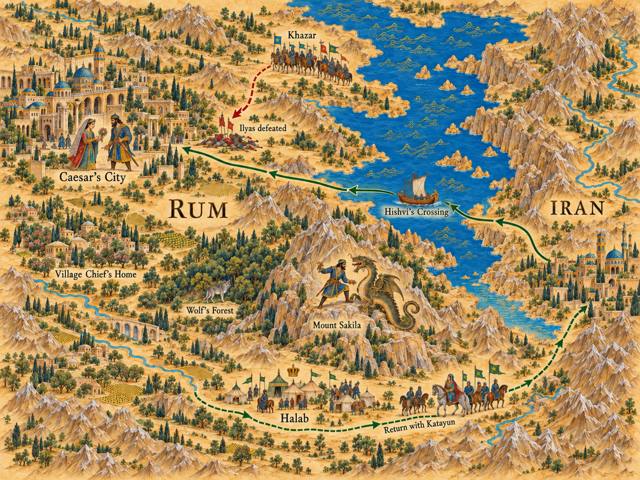
Map: Goshtasb's Exile in Rum
C5.4–C5.18Goshtasb's Exile in Rum

C6Goshtasb, Zardosht, and the War with Arjasp
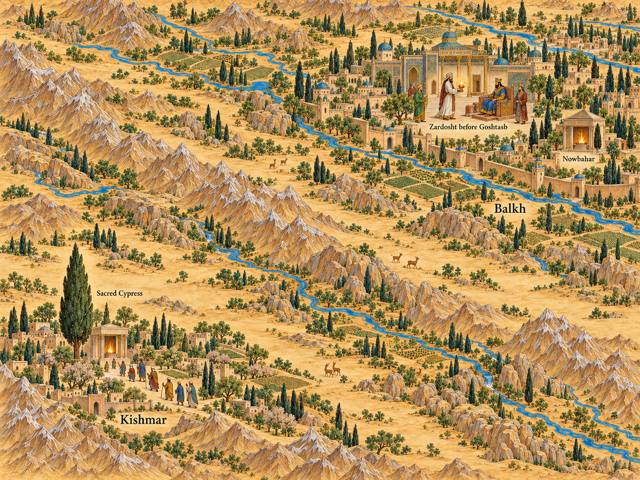
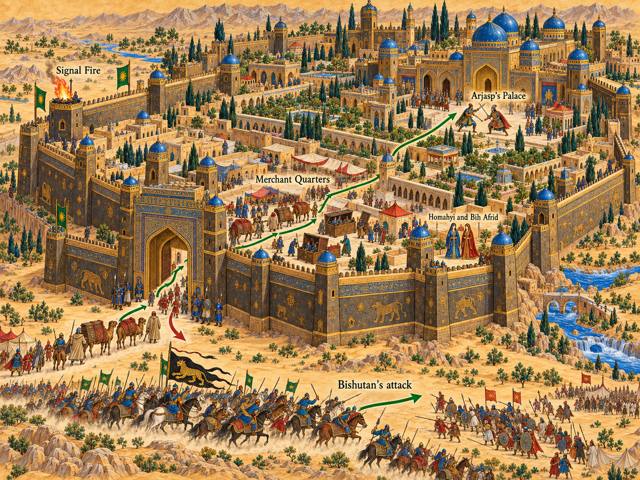
Map: The Coming of Zardosht: The Fire-Temple at Balkh
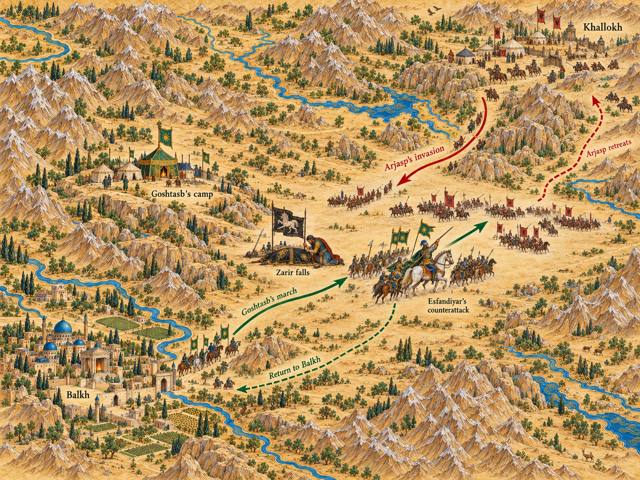
C6.3The Coming of Zardosht: The Fire-Temple at Balkh
Map: The First War with Arjasp
C6.4–C6.20The First War with Arjasp
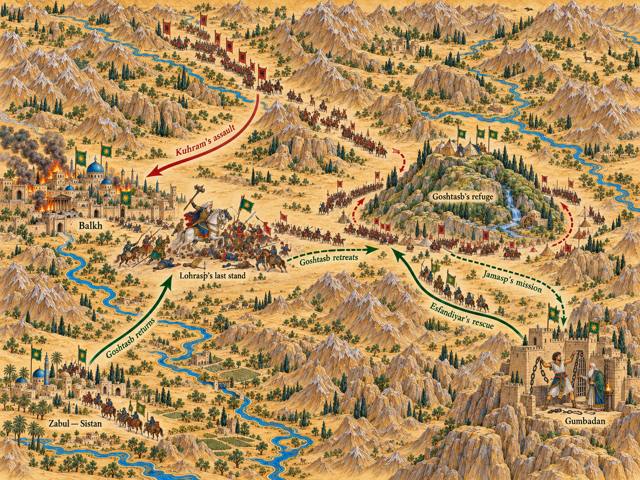
Map: The Second War: The Fall of Balkh
C6.25–C6.32The Second War: The Fall of Balkh

C7Esfandiyar’s Seven Stages and the Ruyin Dezh
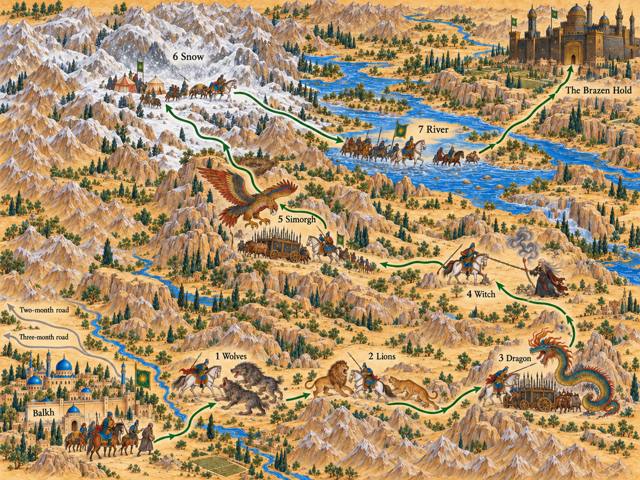
Map: Esfandiyar's Seven Stages to the Brazen Hold
C7.2–C7.12Esfandiyar's Seven Stages to the Brazen Hold
Map: The Storming of the Brazen Hold
C7.9–C7.13The Storming of the Brazen Hold

C8The Tragedy of Rostam and Esfandiyar
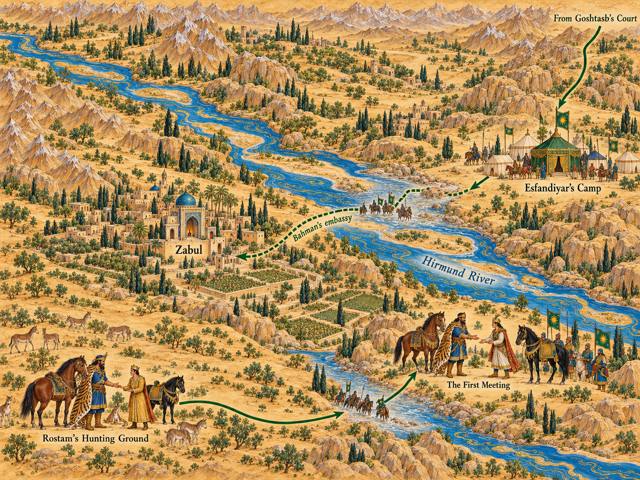
Map: Esfandiyar's March to Zabul
C8.5–C8.13Esfandiyar's March to Zabul
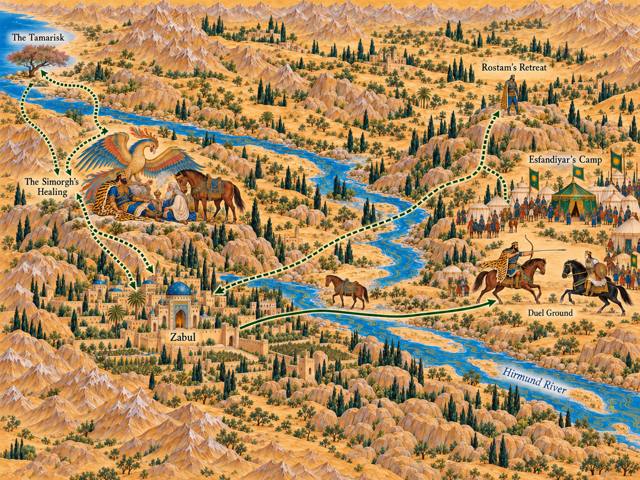
Map: Rostam, the Simorgh, and the Tamarisk Arrow
C8.21–C8.27Rostam, the Simorgh, and the Tamarisk Arrow

C9Rostam and Shaghad

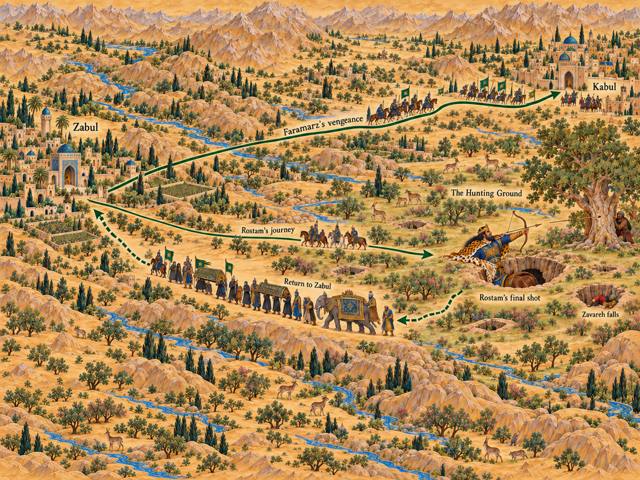
Map: The Death of Rostam at Kabul
C9.2–C9.6The Death of Rostam at Kabul

D1The Reign of Bahman, Son of Esfandiyar
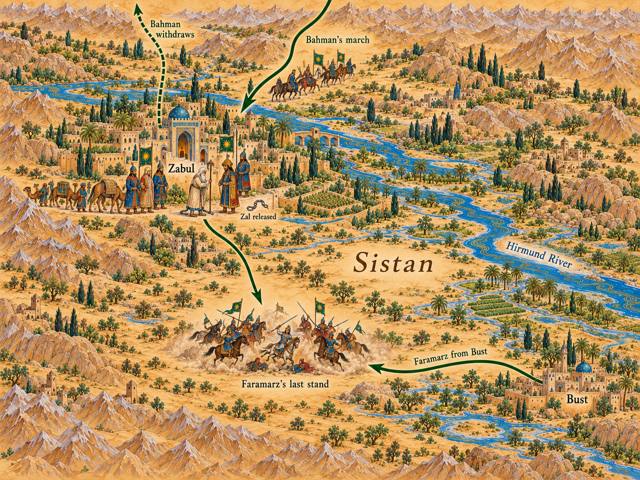
Map: Bahman's Vengeance on Sistan
D1.1–D1.4Bahman's Vengeance on Sistan

D2Homahyi and the Founding of Darab’s Line
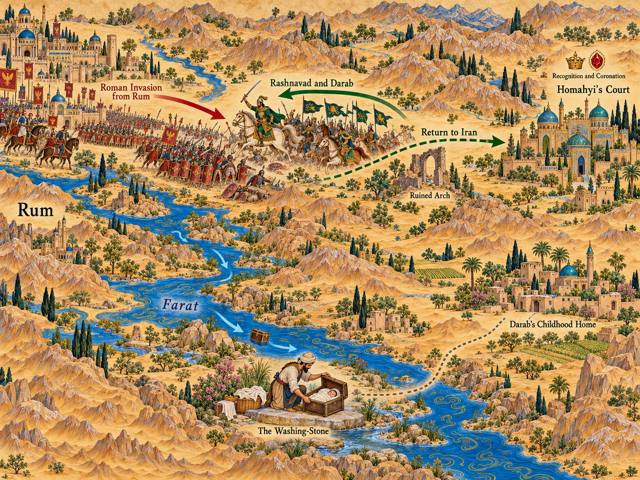
Map: The River-Child Darab and the Roman War
D2.1–D2.7The River-Child Darab and the Roman War

D3Darab

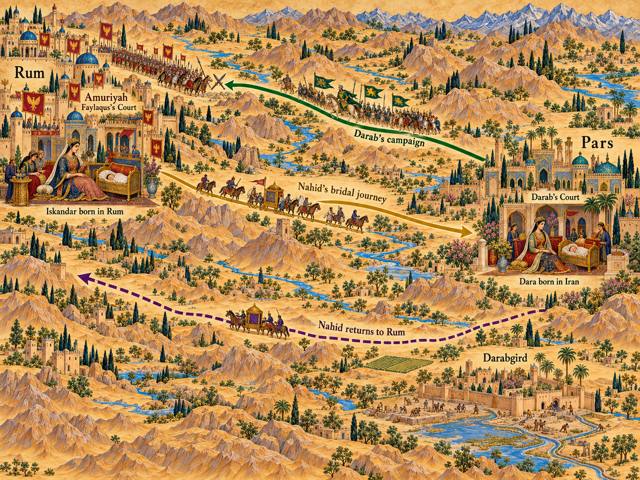
Map: Darab's Reign and the Two Births
D3.1–D3.4Darab's Reign and the Two Births

D4Dara and Iskandar

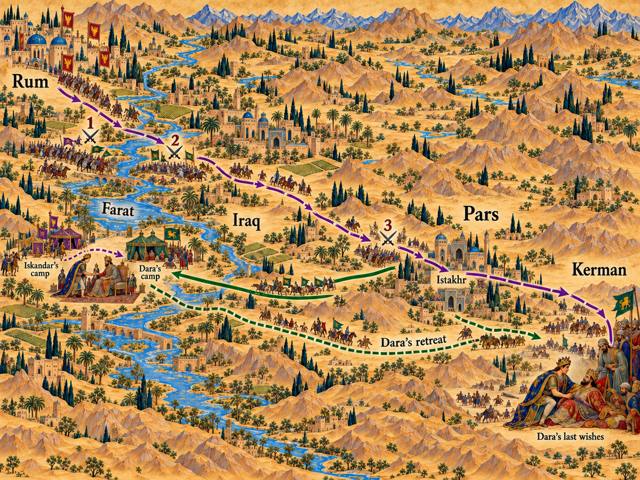
Map: The War of Dara and Iskandar
D4.3–D4.9The War of Dara and Iskandar

D5The Iskandar Cycle
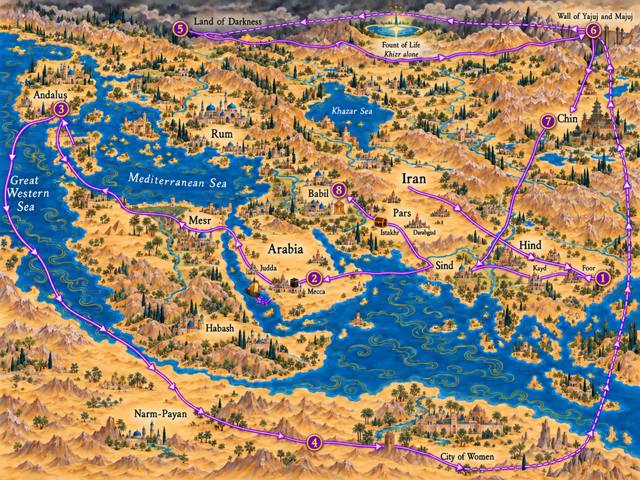
Map: Iskandar's World — The Master Circuit
Before D5 / at the Iskandar cycleIskandar's World — The Master Circuit
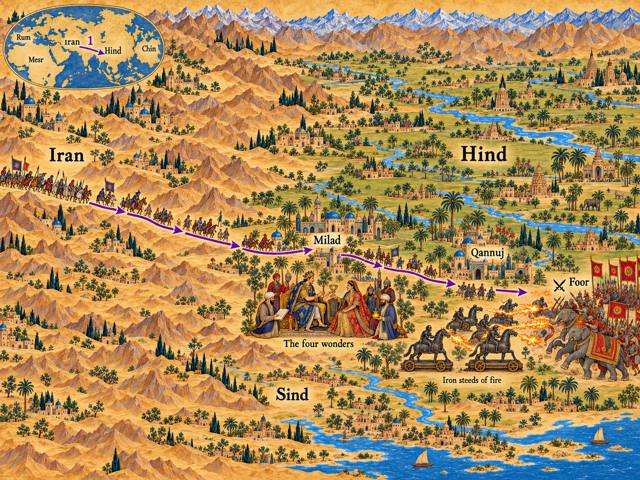
Map: Iskandar into Hind: Kayd and Foor
D5.5–D5.15Iskandar into Hind: Kayd and Foor
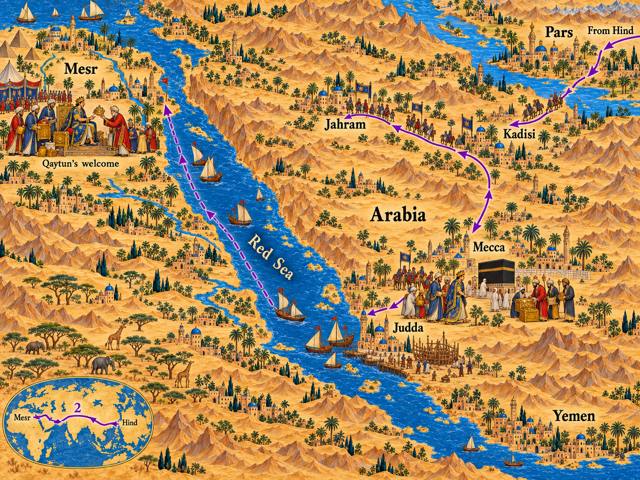
Map: The Pilgrimage West: Mecca, Judda, and Mesr
D5.16–D5.17The Pilgrimage West: Mecca, Judda, and Mesr
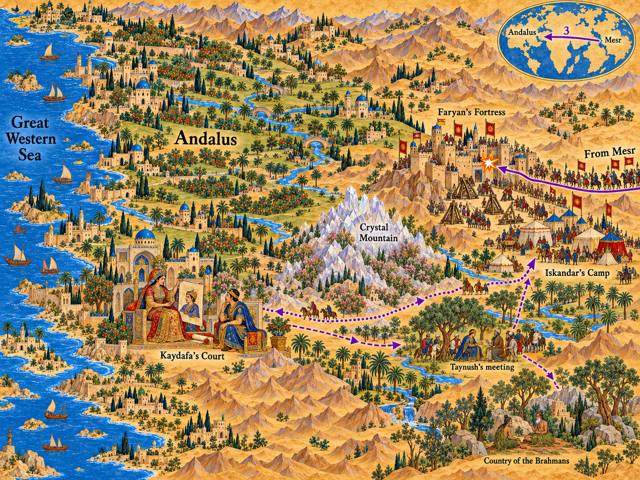
Map: Andalus and Queen Kaydafa
D5.18–D5.24Andalus and Queen Kaydafa
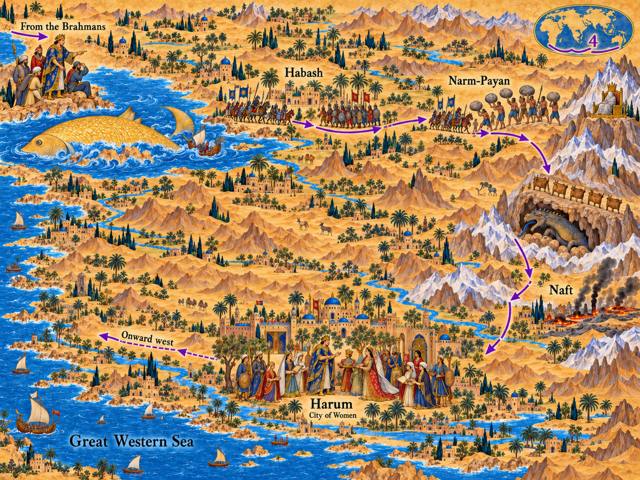
Map: The Marvels of the South
D5.25–D5.28The Marvels of the South
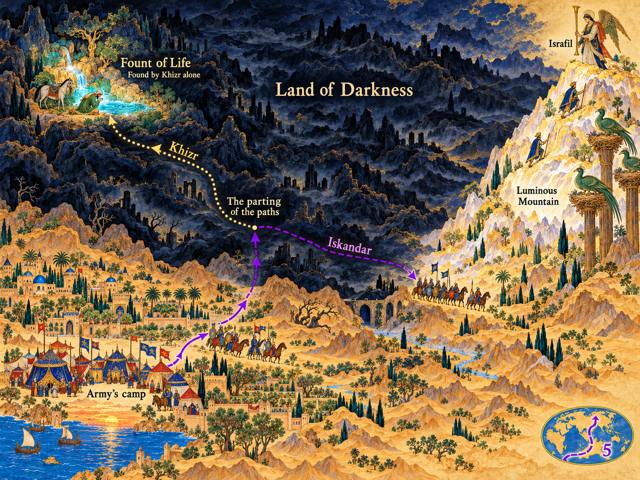
Map: The Land of Darkness and the Fount of Life
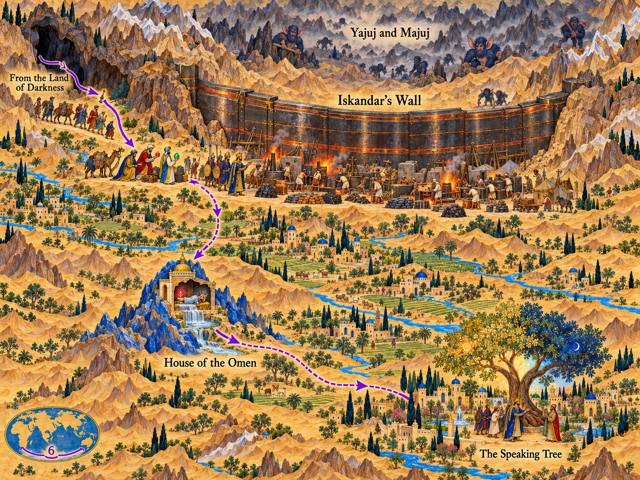
D5.29The Land of Darkness and the Fount of Life
Map: The Wall against Yajuj and Majuj
D5.30–D5.31The Wall against Yajuj and Majuj
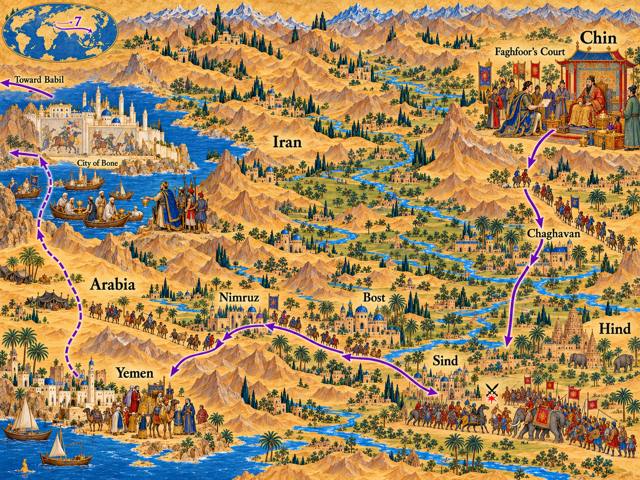
Map: The Eastern Return: Chin, Sind, and the Treasure
D5.32–D5.34The Eastern Return: Chin, Sind, and the Treasure
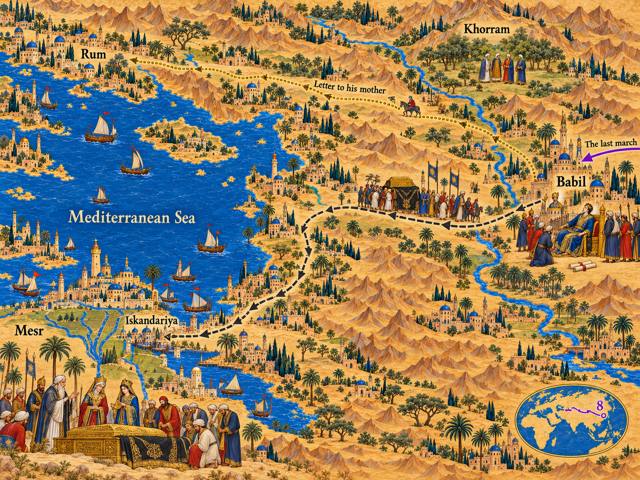
Map: Babil and the Death of Iskandar
D5.35–D5.39Babil and the Death of Iskandar

Volume III · The Sasanians

◈The world of this volume
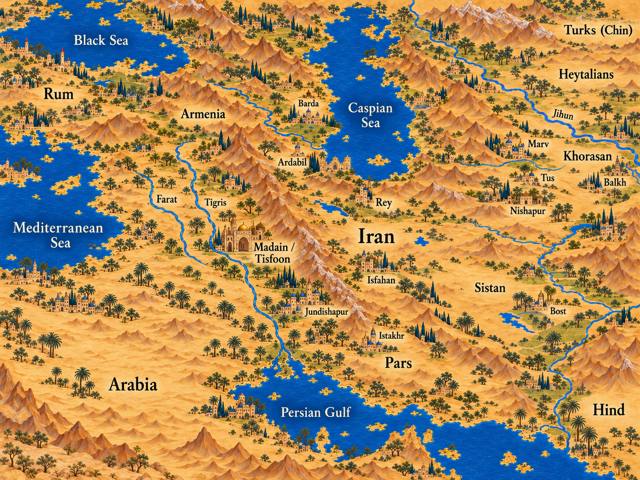
Map: The Sasanian World
Volume IIIThe Sasanian World
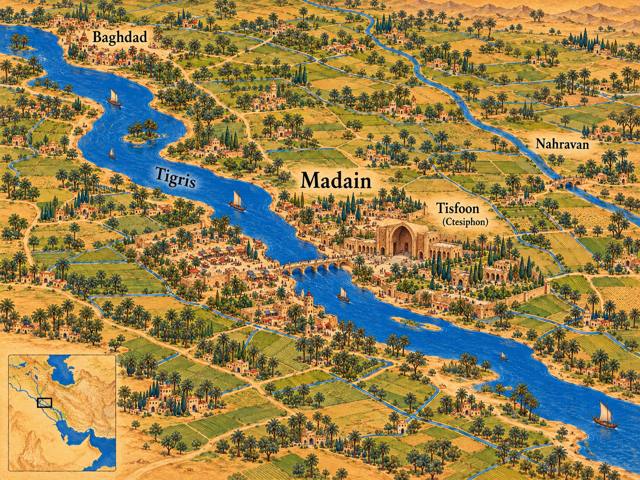
Map: The Heart of the Empire: Ctesiphon and the Cities of the Tigris
Volume IIIThe Heart of the Empire: Ctesiphon and the Cities of the Tigris

D6The Ashkanian Dynasty
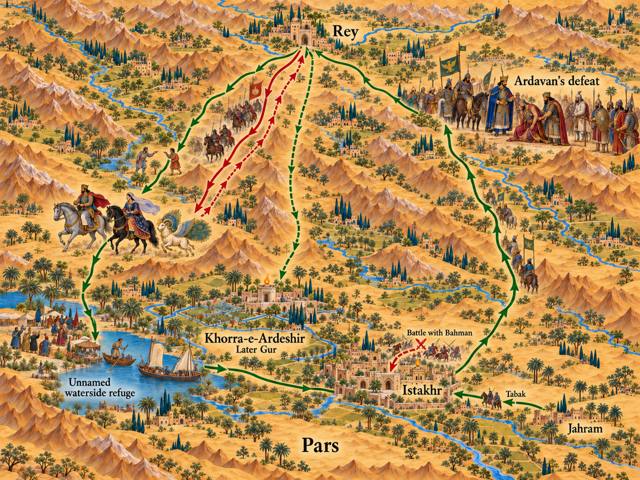
Map: The Rise of Ardashir: Flight and the Fall of Ardavan
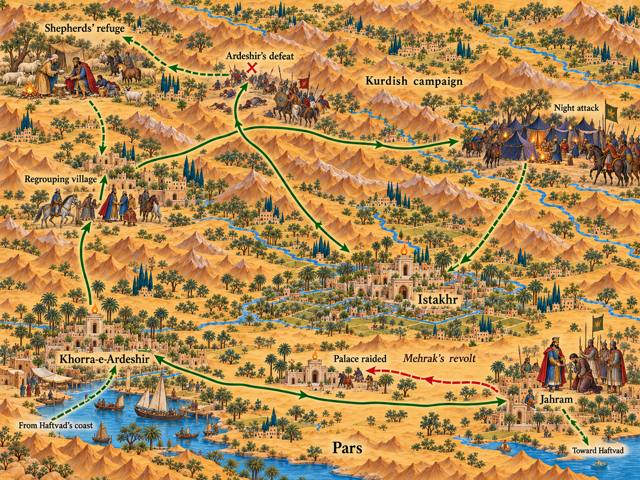
D6.5–D6.9The Rise of Ardashir: Flight and the Fall of Ardavan
Map: Ardashir's Wars of Consolidation: the Kurds and Mehrak of Jahram
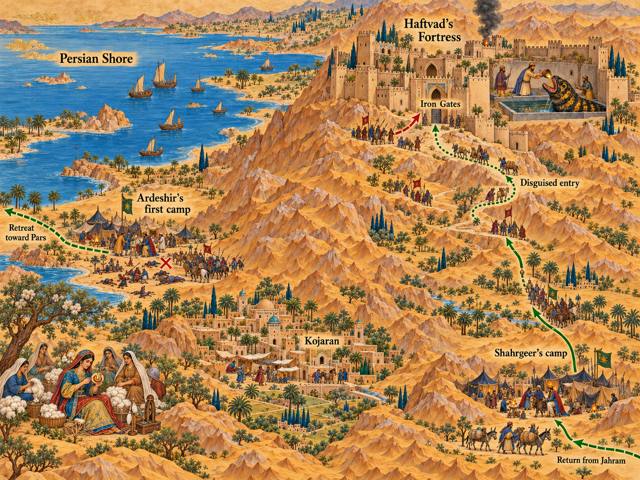
D6.10–D6.11, D6.14Ardashir's Wars of Consolidation: the Kurds and Mehrak of Jahram
Map: Haftvad and the Worm
D6.12–D6.16Haftvad and the Worm

D7The Early Sasanians
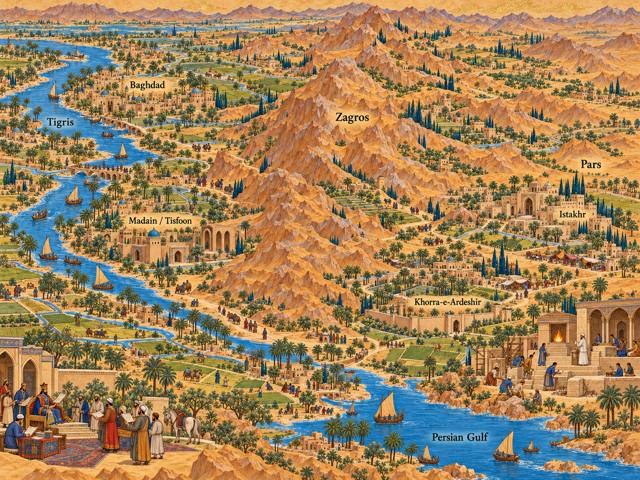
Map: Ardashir's New Order: the Founding of Cities
D7.7, D7.1Ardashir's New Order: the Founding of Cities
Map: Shapur I's War with Rum
D7.12.2Shapur I's War with Rum

D8The Shapur Zul-Aktaf Cycle and Later Early Sasanian Reigns
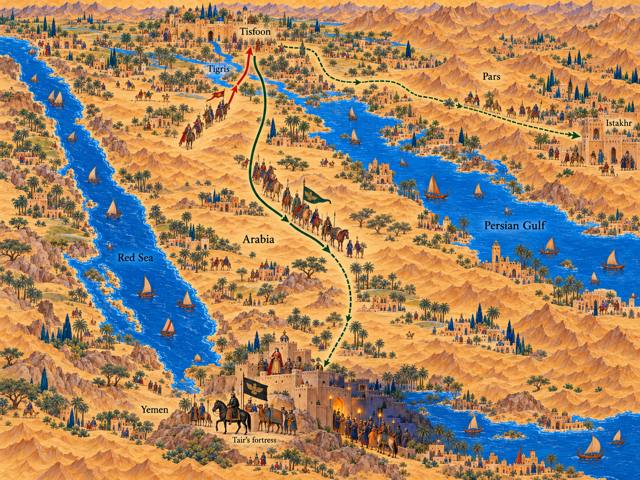
Map: Shapur “Pierce-Shoulder” and the Arabian Campaign
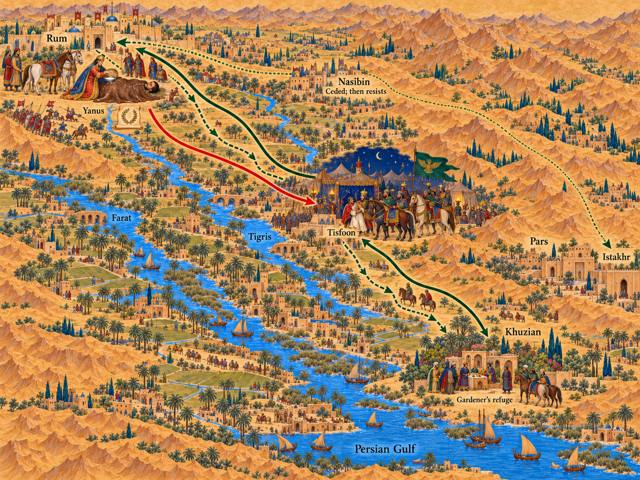
D8.1.1–D8.1.3Shapur “Pierce-Shoulder” and the Arabian Campaign
Map: Shapur Zul-Aktaf in Rum: Captivity and Revenge
D8.1.4–D8.1.10Shapur Zul-Aktaf in Rum: Captivity and Revenge

D9Yazdegard I and the Rise of Bahram Goor
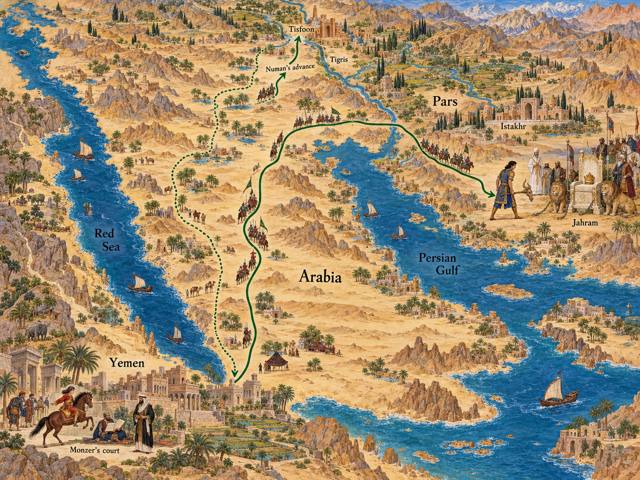
Map: Bahram Gur's Arabian Youth and the March to the Throne
D9.2, D9.9–D9.13Bahram Gur's Arabian Youth and the March to the Throne

D10The Bahram Goor Cycle: Justice, Foreign Adventures, and End of a Reign
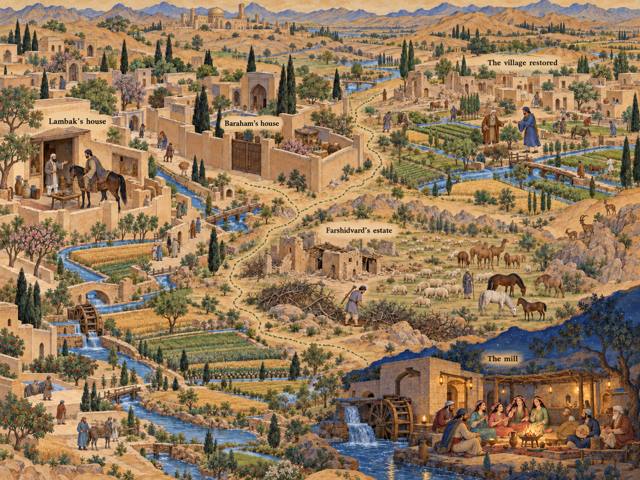
Map: Bahram Gur's Justice in Disguise
D10.3–D10.16Bahram Gur's Justice in Disguise
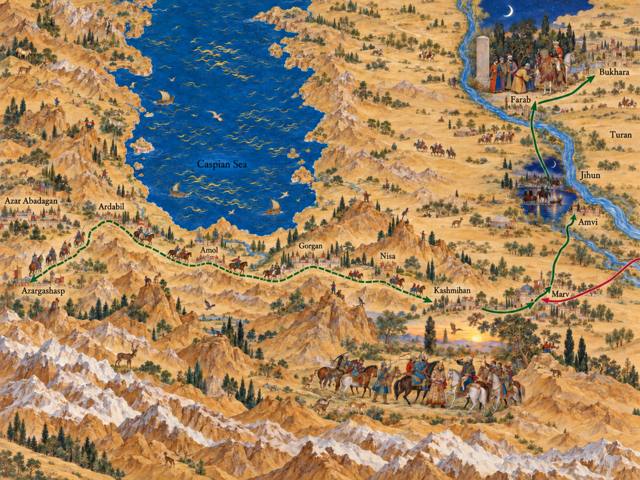
Map: The Daring March against the Khan of Chin
D10.19–D10.22The Daring March against the Khan of Chin
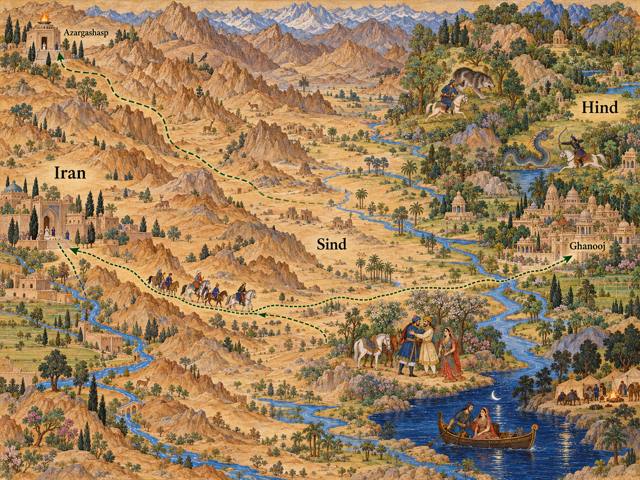
Map: Bahram Gur's Incognito Journey to Hind
D10.26–D10.36Bahram Gur's Incognito Journey to Hind
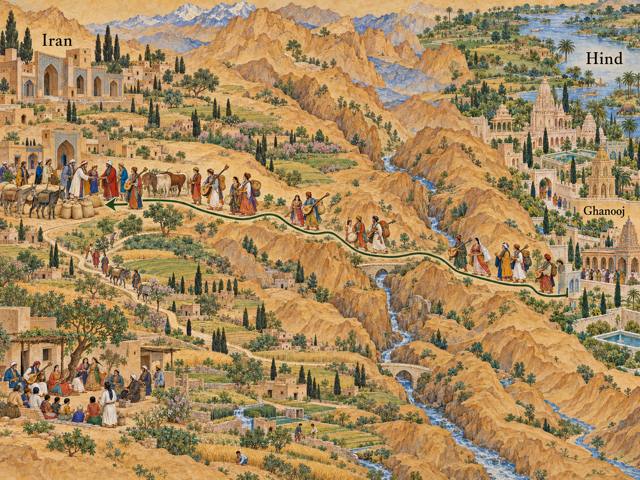
Map: Bahram Gur Brings the Luri from Hind
D10.39Bahram Gur Brings the Luri from Hind

D11Short Reigns and a Crisis with Khoshnavaz
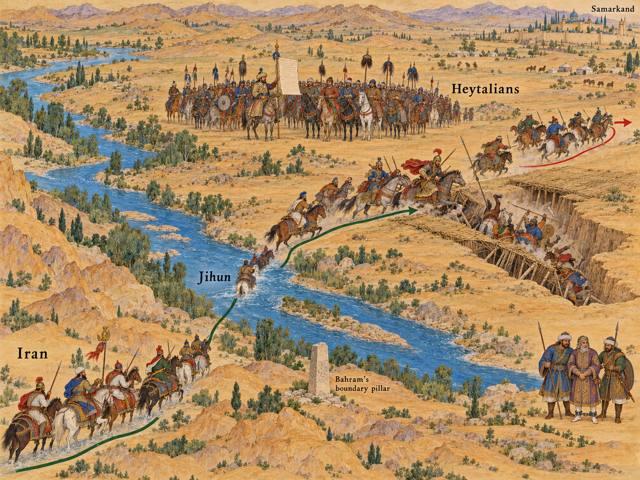
Map: Pirooz's Disaster against Khoshnavaz
D11.3.2–D11.3.4Pirooz's Disaster against Khoshnavaz

D12Qobad and the Mazdakite Revolution
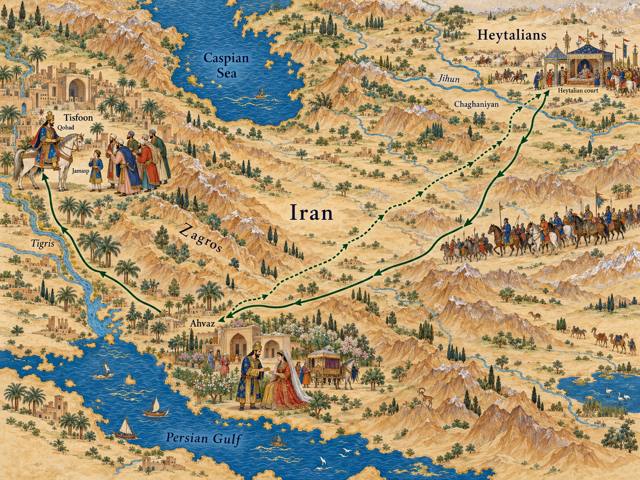
Map: Qobad's Flight to the Hephthalites and Return
D12.4–D12.5Qobad's Flight to the Hephthalites and Return

D13Anooshirvan and the Road to the End-time
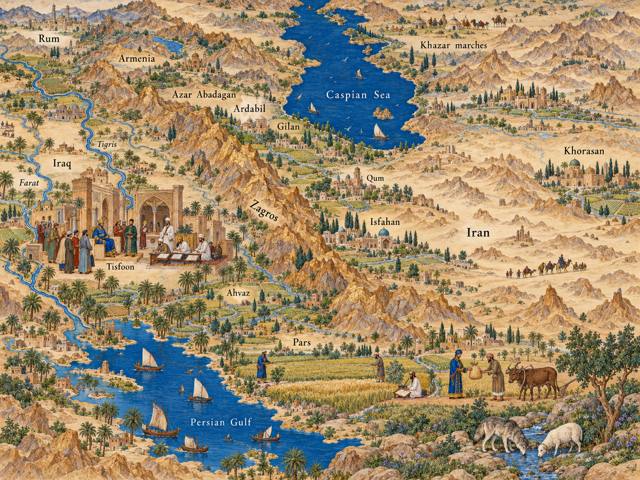
Map: Anooshirvan's Just Order
D13.3, D13.2Anooshirvan's Just Order
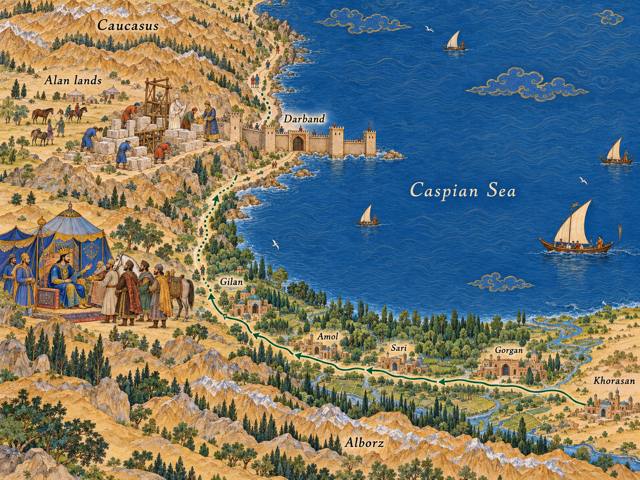
Map: The Gate of Darband: Fortifying the Northern Frontier
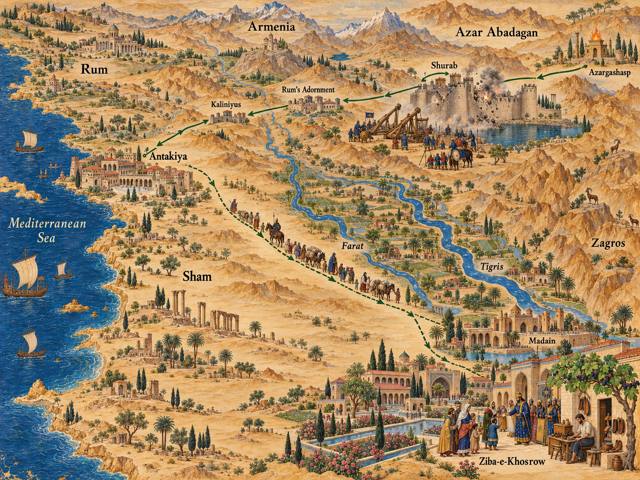
D13.6–D13.7The Gate of Darband: Fortifying the Northern Frontier
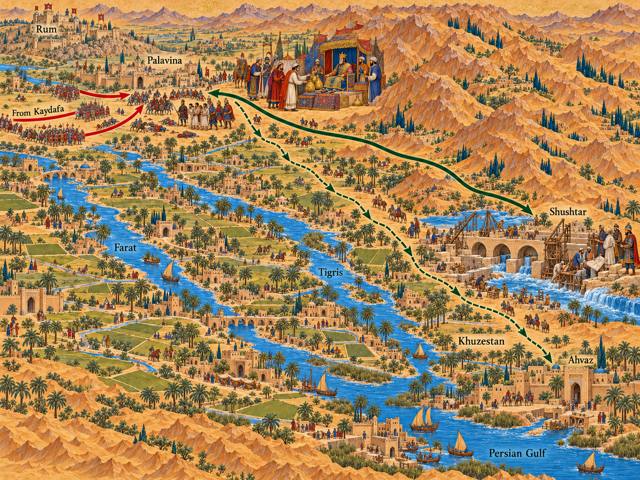
Map: Anooshirvan's War with Rum and the Founding of Ziba-e-Khosrow
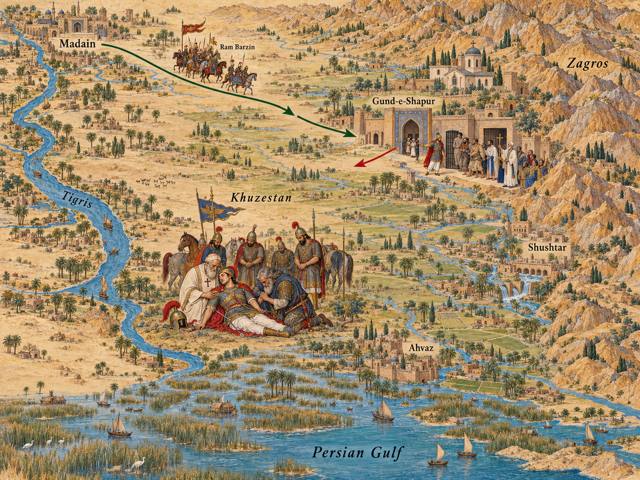
D13.11–D13.15Anooshirvan's War with Rum and the Founding of Ziba-e-Khosrow
Map: The Revolt of Nushzad at Jundishapur
D13.16–D13.19The Revolt of Nushzad at Jundishapur

E1The Story of Mahbud and Other Matters
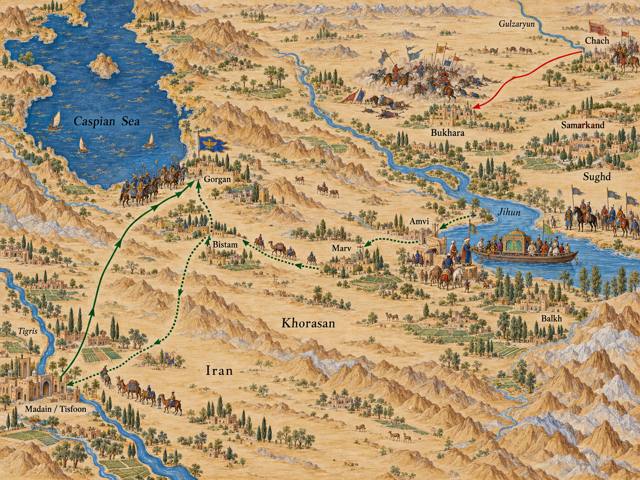
Map: The End of the Hephthalites: the Partition at the Jihun
E1.4–E1.11The End of the Hephthalites: the Partition at the Jihun

E2Chess, Wisdom, and the Kalila and Dimna
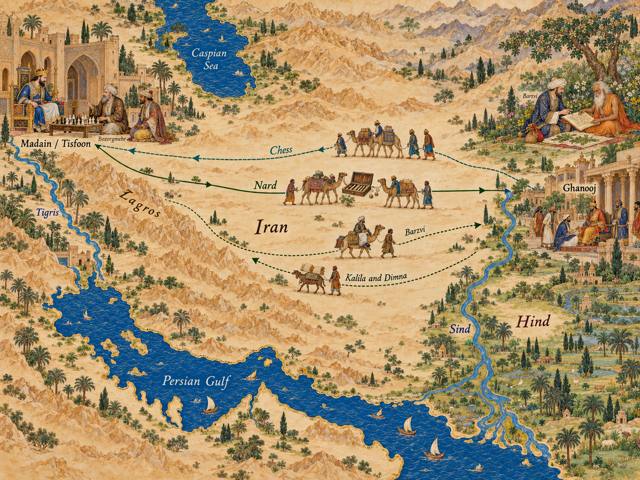
Map: The Traffic of Wisdom: Chess and the Kalila and Dimna from Hind
E2.1–E2.4The Traffic of Wisdom: Chess and the Kalila and Dimna from Hind

E4Anooshirvan’s Last Years

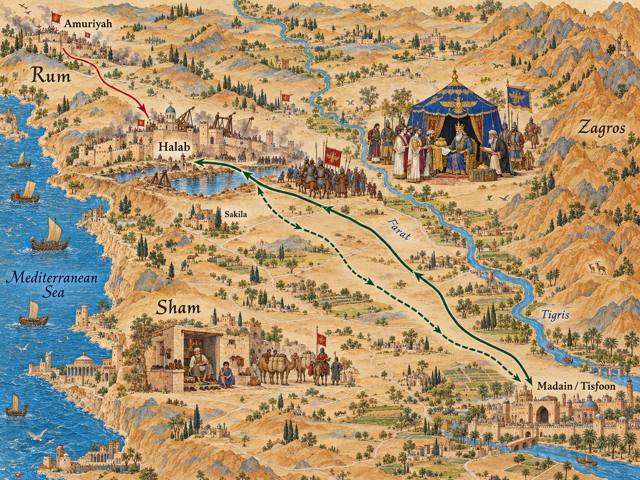
Map: Anooshirvan's Last March on Rum
E4.1–E4.3Anooshirvan's Last March on Rum

E5Hormizd, Son of Anooshirvan

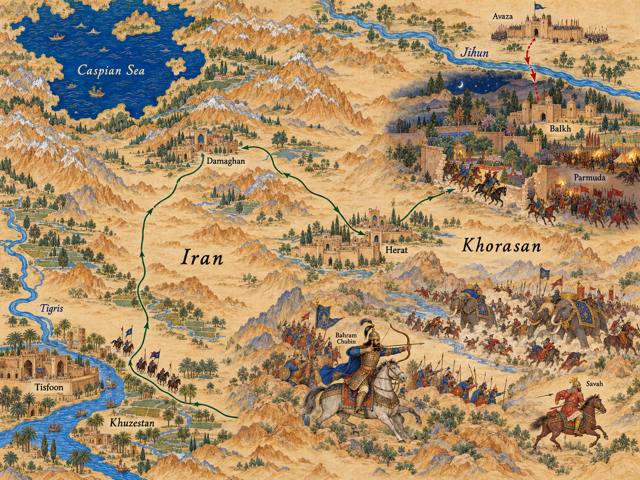
Map: Bahram Chubin's War against Savah
E5.7–E5.13Bahram Chubin's War against Savah

E6Khosrow Parviz

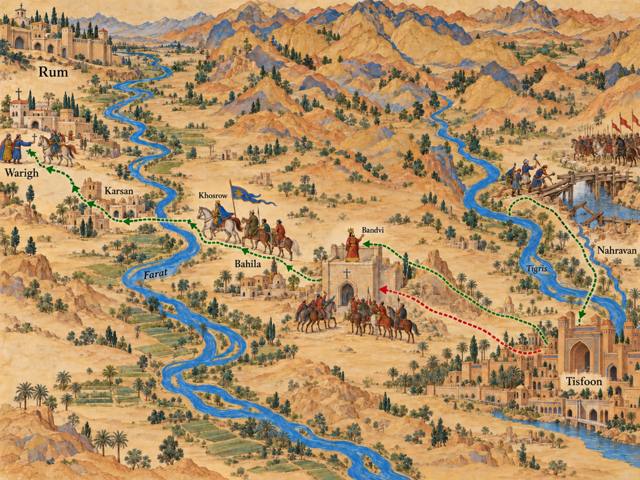
Map: Bahram Chubin's Rebellion and Khosrow Parviz's Flight to Rum
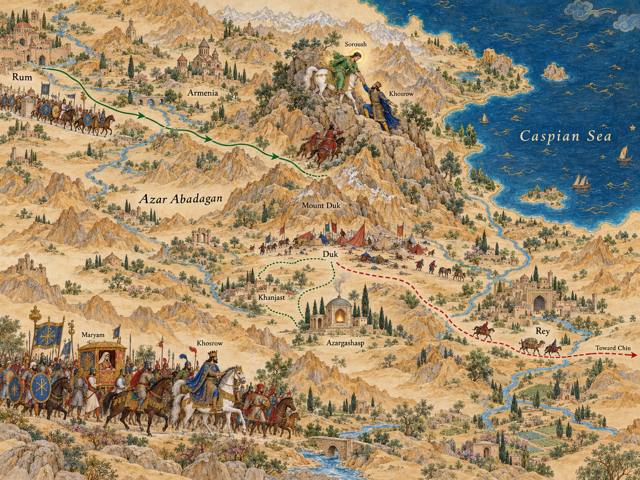
E6.4–E6.14Bahram Chubin's Rebellion and Khosrow Parviz's Flight to Rum
Map: Khosrow's Return with Roman Aid and the Fall of Bahram Chubin
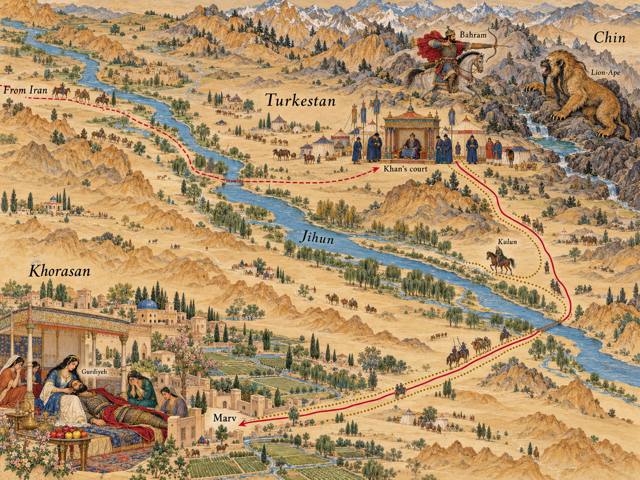
E6.21–E6.28Khosrow's Return with Roman Aid and the Fall of Bahram Chubin
Map: Bahram Chubin among the Turks: Exile and Death
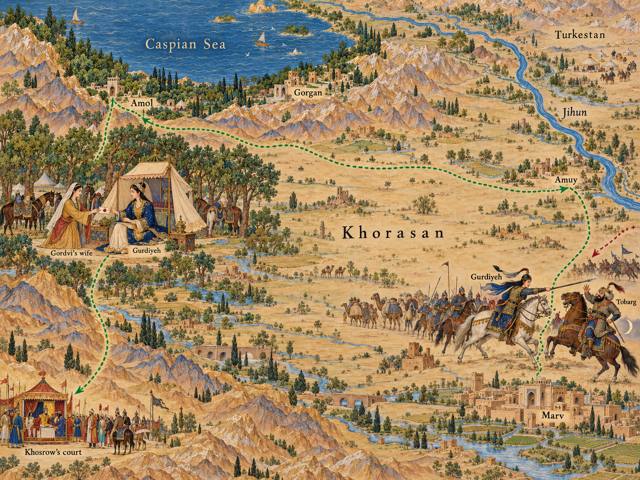
E6.32–E6.38Bahram Chubin among the Turks: Exile and Death
Map: Gurdiyeh's Flight from Marv
E6.40–E6.47Gurdiyeh's Flight from Marv

E7The Story of Khosrow Parviz and Shirin
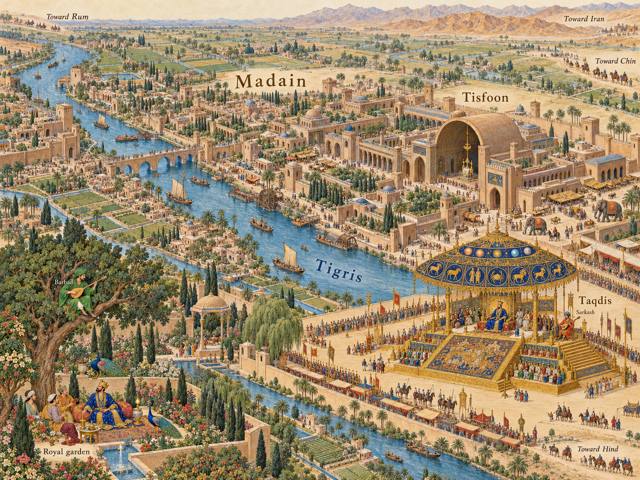
Map: The Zenith of Khosrow Parviz: Madain and the Throne of Taqdis
E7.5–E7.8The Zenith of Khosrow Parviz: Madain and the Throne of Taqdis

E8Shiruyeh’s Coup and the End of the Great Reign
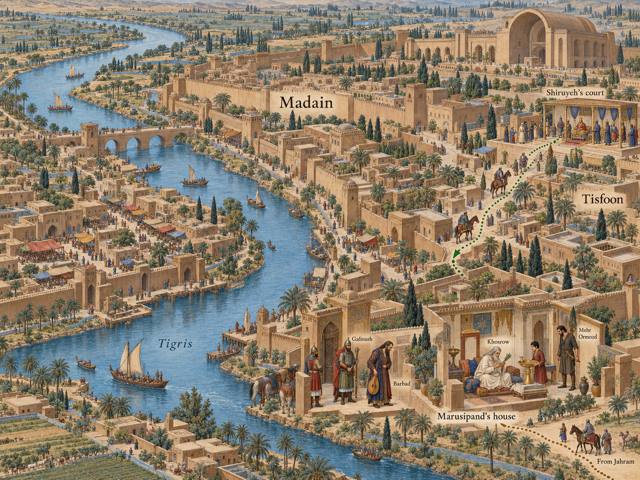
Map: Shiruyeh's Coup and the Death of Khosrow Parviz
E8.1–E8.5Shiruyeh's Coup and the Death of Khosrow Parviz

E10Yazdegard

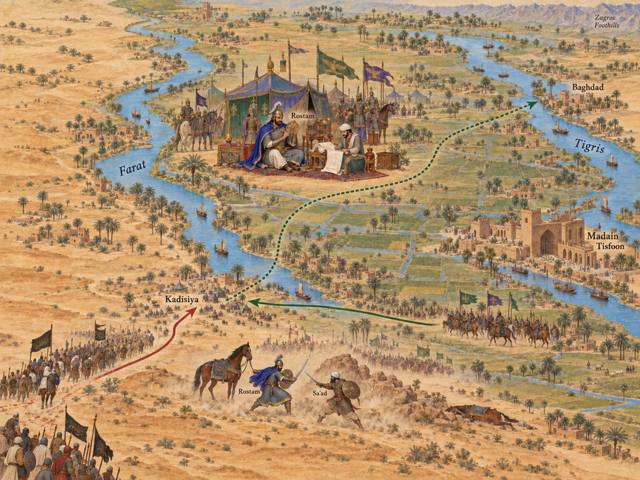
Map: The Arab Invasion and the Battle of Qadisiyya
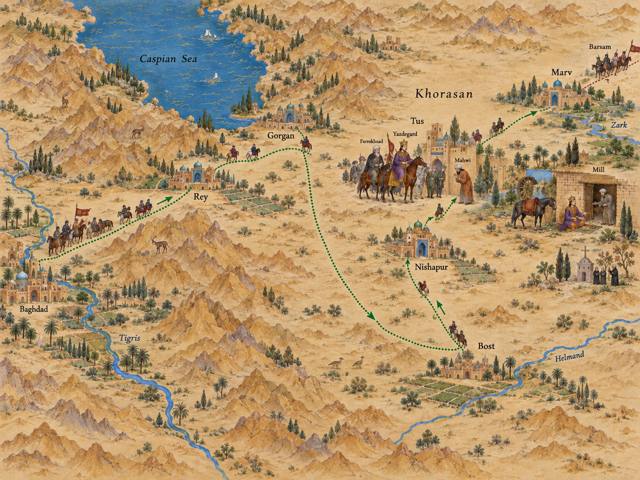
E10.2–E10.4The Arab Invasion and the Battle of Qadisiyya
Map: The Last Flight of Yazdegard
E10.5–E10.11The Last Flight of Yazdegard
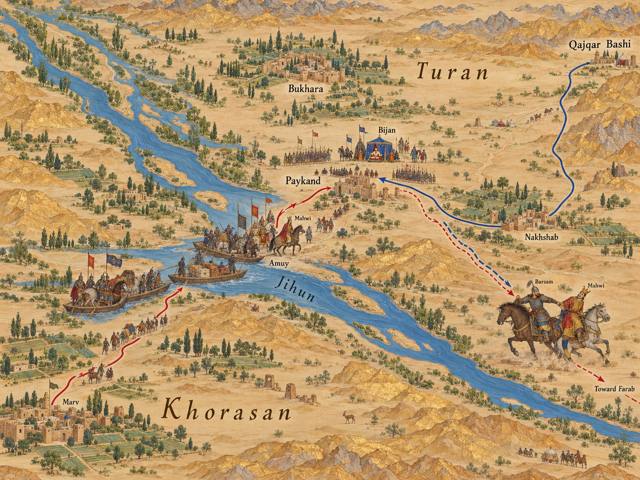
Map: The Aftermath: Mahwi's Usurpation and Bijan's Vengeance
E10.12–E10.14The Aftermath: Mahwi's Usurpation and Bijan's Vengeance

E11The Epilogue

Map: The Completion of the Shahnameh
E11The Completion of the Shahnameh